Service Account Setup
To set up a Service Account and install the necessary Plerion infrastructure, customers are required to choose an AWS Account. It is recommended to create a new AWS Account to have a clear understanding of the costs associated with the service account and to avoid any potential impact on existing resources. However, customers can also utilize an existing AWS Account.
Prerequisites
In some cases, new AWS accounts may not have all regions activated by default, and manual activation might be necessary. Follow the steps below to check and activate the regions if needed.
Verifying AWS Region Activation
- Log in to the AWS Console.
- Go to the desired region's EC2 section.
- To check if an AWS region is active, create 10 t3.micro EC2 instances or 1 very large instance in the region. If the region is inactive, you will see the following message:
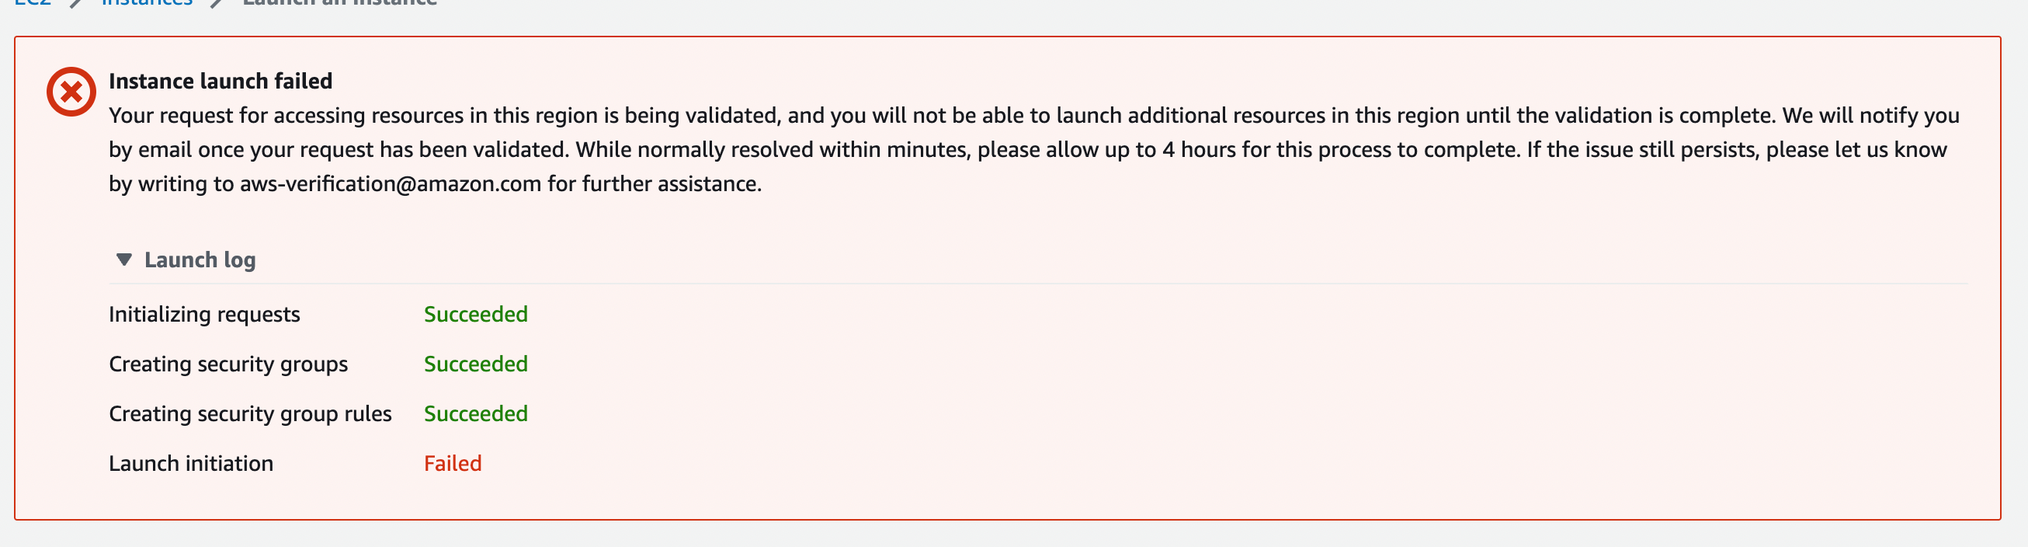
- Typically, after encountering this error, you will receive an email within 10-15 minutes confirming that the region is now activated. If you don't receive the email, raise a ticket with AWS to activate the AWS account:
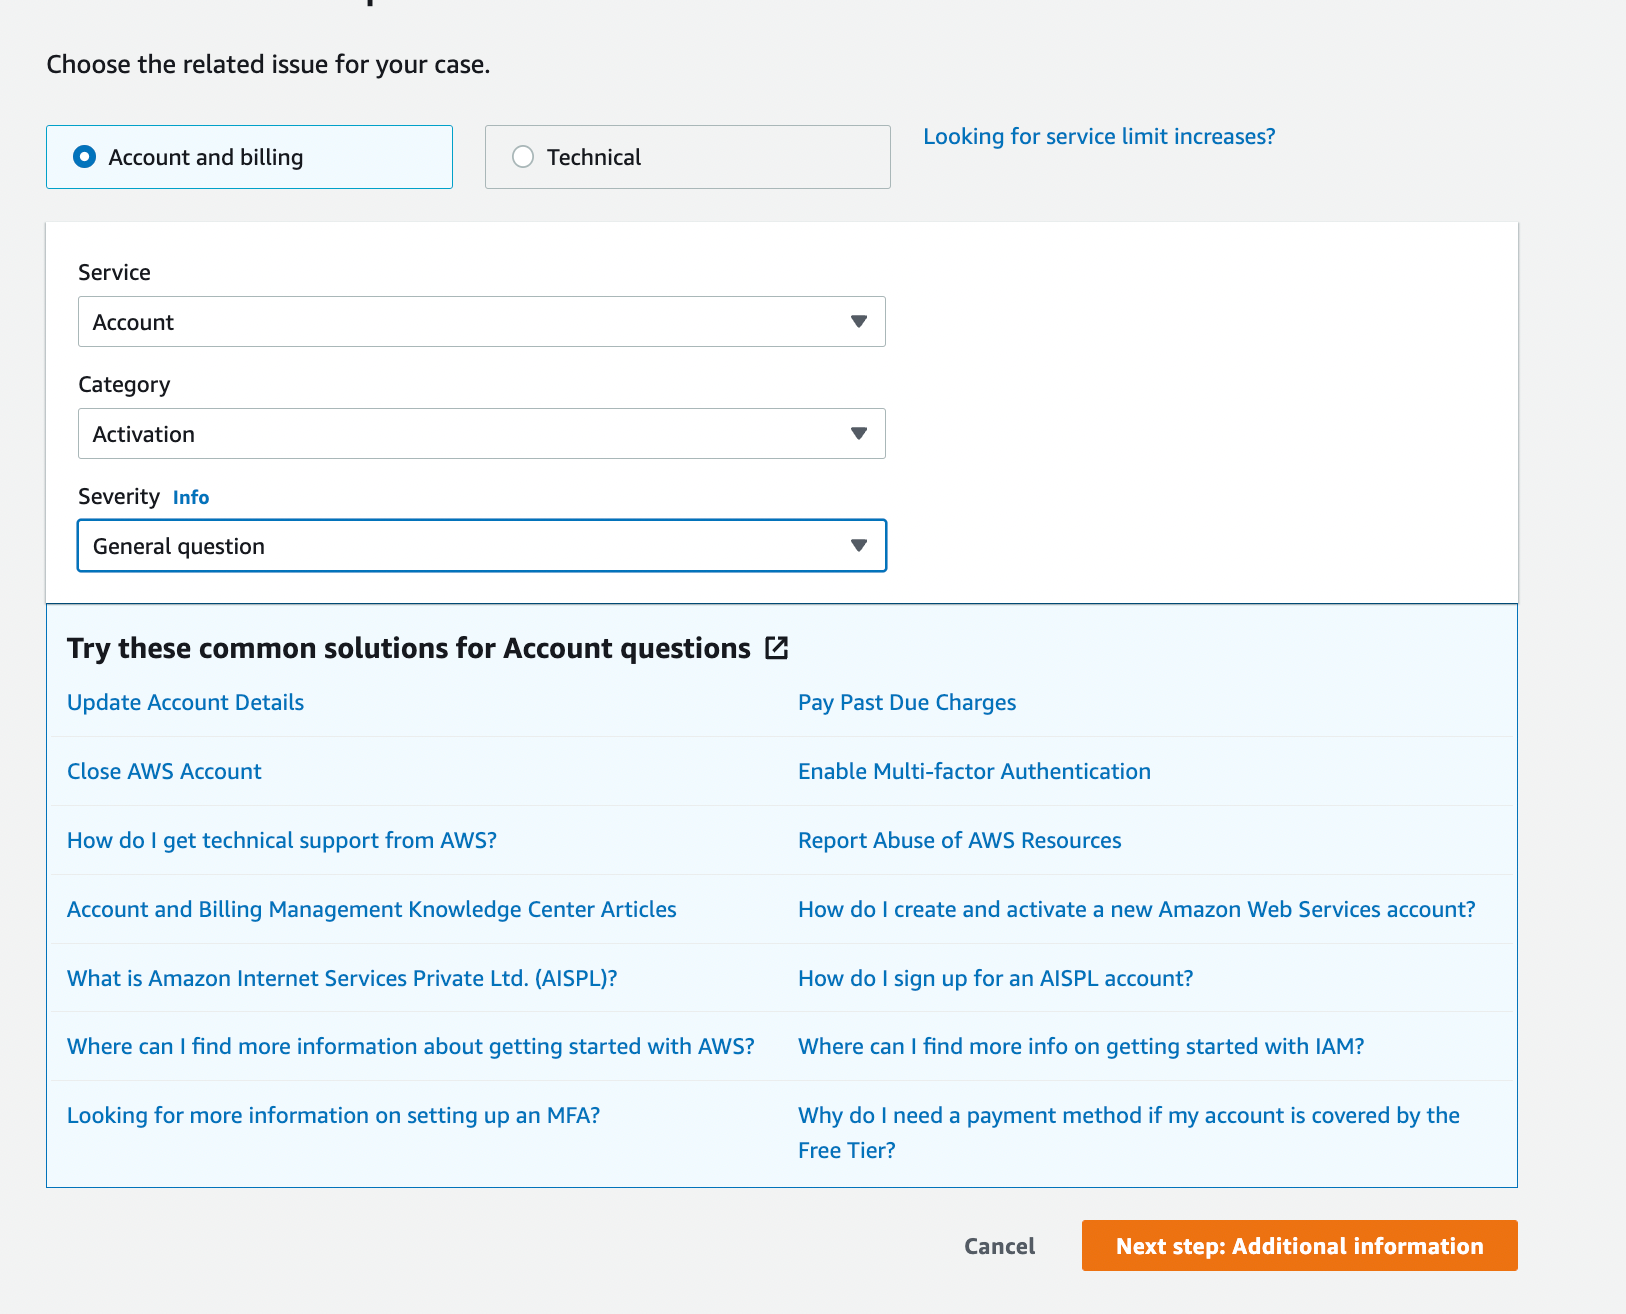
- Go to https://console.aws.amazon.com/support/home#/ (opens in a new tab)
- Create a new case.
- Select the following parameters:
Remember to terminate the EC2 instances after checking the region activation status.
Verifying AWS Region Service Quotas
Service account utilizes c7i.xlarge EC2 instances (known as Appliances) if available in that region; otherwise, it will use t3.large EC2 instances. Each c7i.xlarge instance is equal to 4 vCPUs, 8 GiB Memory and t3.large is equal to 2 vCPUs and 8 GiB Memory. The current maximum number of instances that the service account will attempt to deploy is 10. This requires that the Running On-Demand Standard (A, C, D, H, I, M, R, T, Z) instances service quota applied value is at least 40.
Default EC2 service quotas may require updating to support service account appliances. Follow the steps below to view the current service quotas and to request a quota increase if required.
- Log in to the AWS Console.
- Ensure the desired region is selected in the region selector at the top right corner. If not, click the region dropdown and select the appropriate region.
- Enter Service quotas in the search bar and select the Service Quotas service.
- In the Service Quotas navigation pane, choose AWS services.
- Enter EC2 in the search field and select the Amazon Elastic Compute Cloud (Amazon EC2) service.
- Enter Running On-Demand Standard (A, C, D, H, I, M, R, T, Z) instances in the find quotas search field and select Running On-Demand Standard (A, C, D, H, I, M, R, T, Z) instances
- Review the Applied quota value. The current minimum required for service account is 40. If the applied value is less than 40, continue to request a quota increase.
- In the same page, select the Request quotas increase button.
- Ensure the quota name is Running On-Demand Standard (A, C, D, H, I, M, R, T, Z) instances and the Region is correct.
- Enter the desired quota value and choose Request. A confirmation message should appear at the top of the screen.
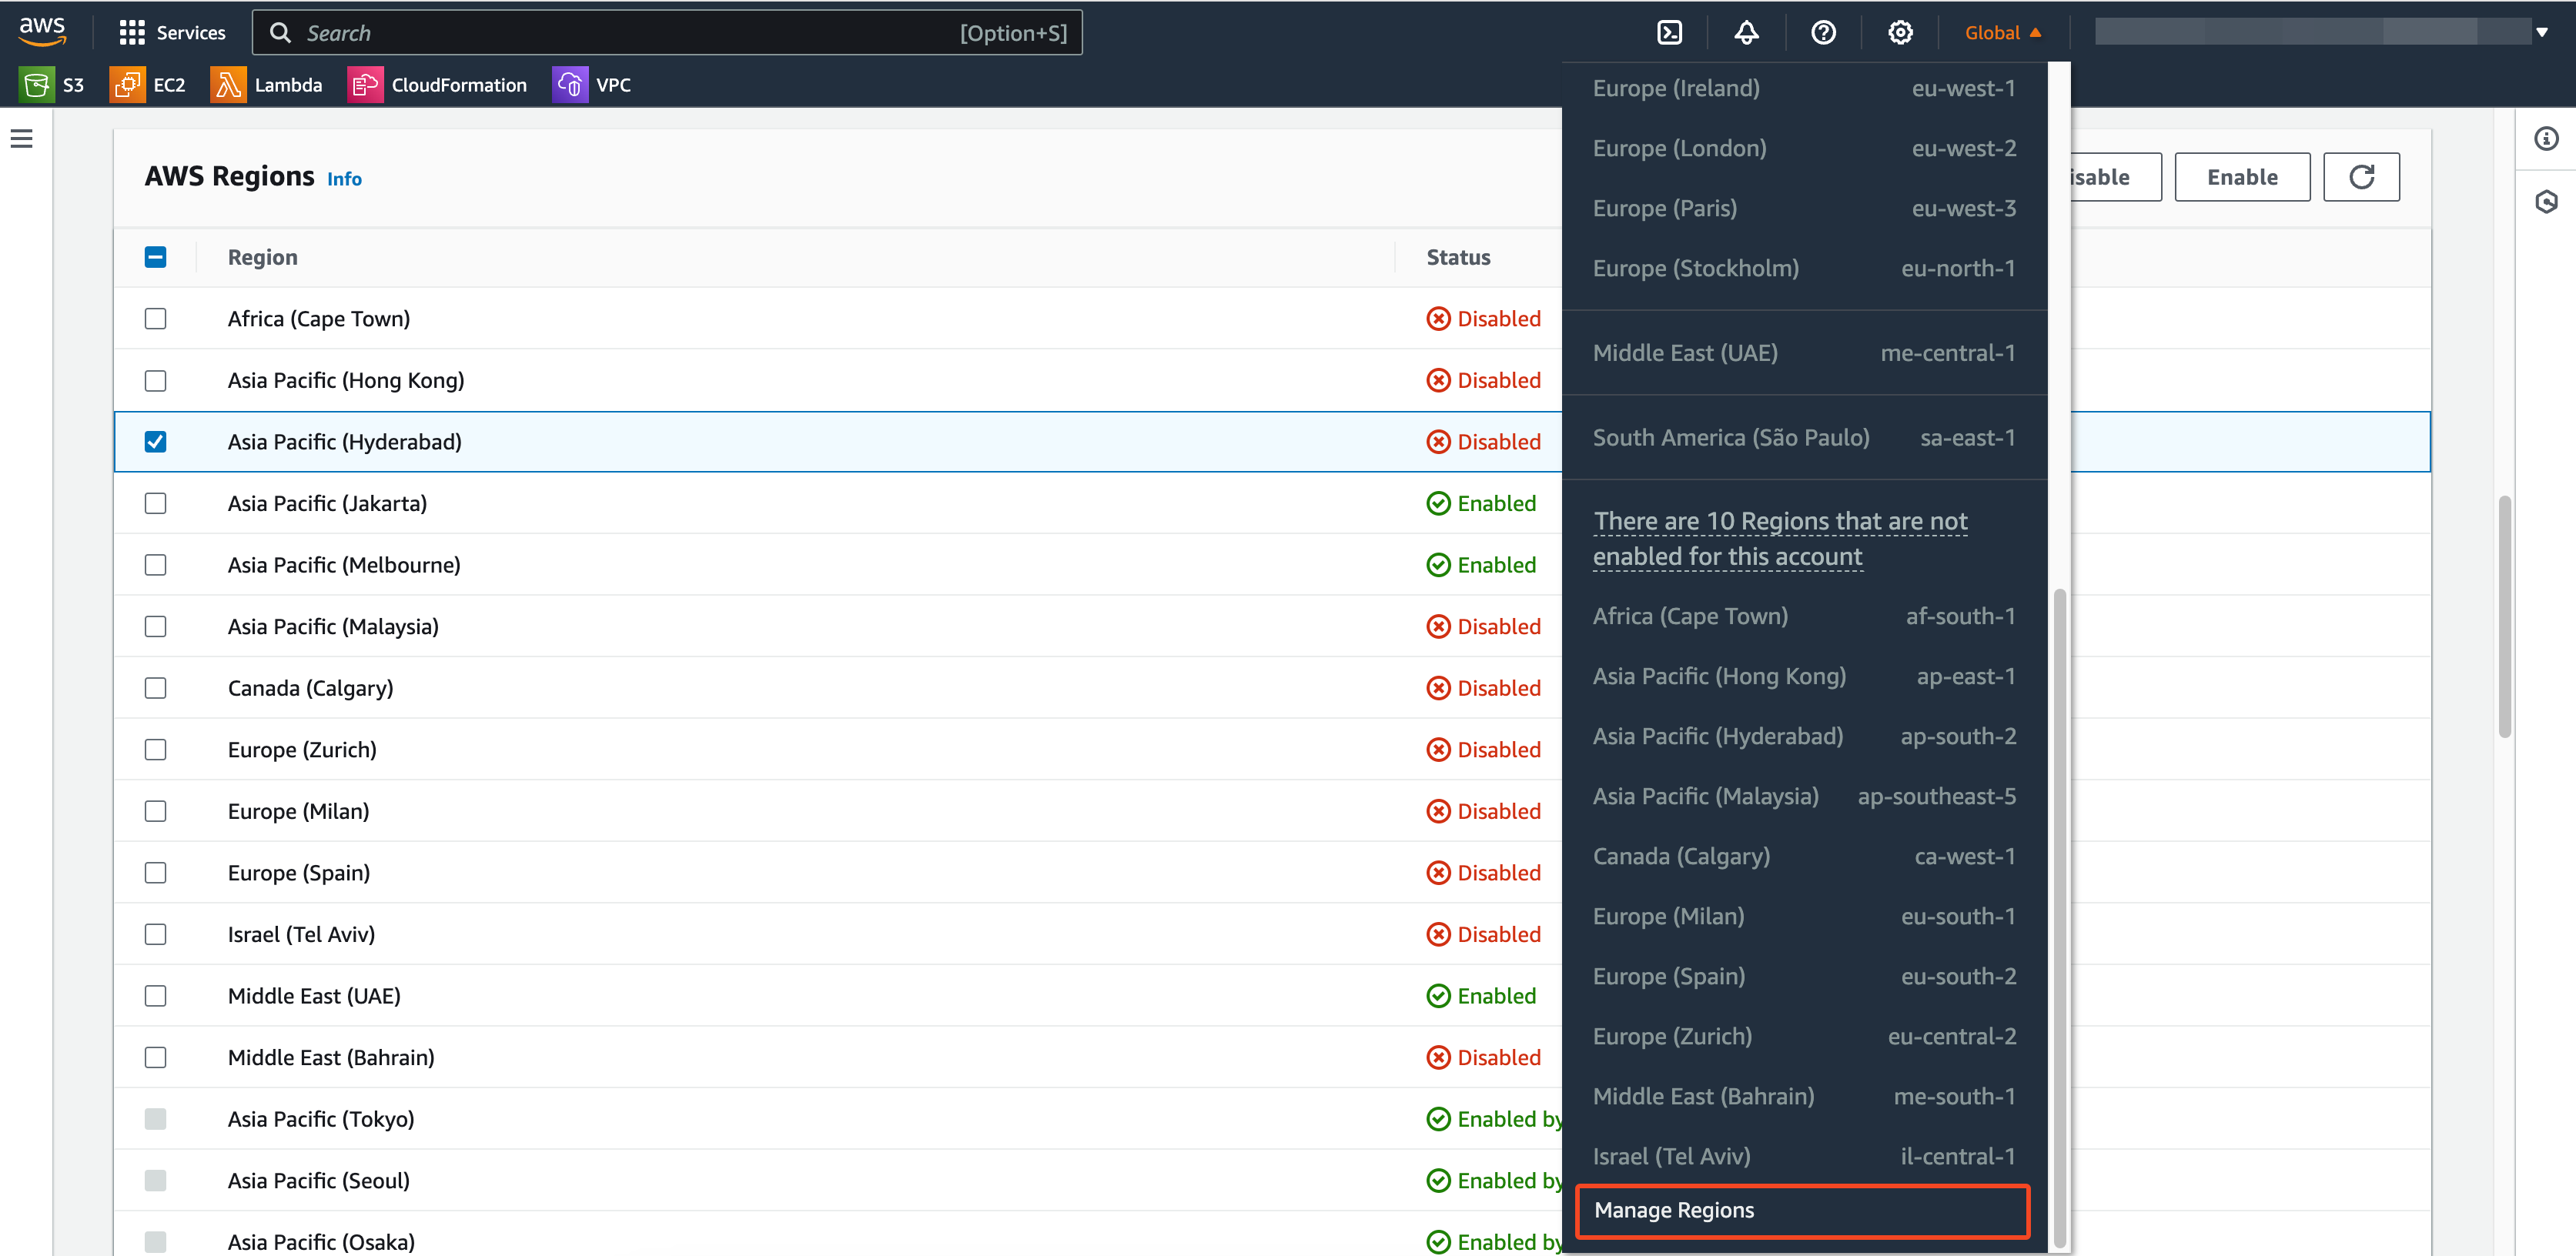
Verifying AWS Region Enablement
Not all regions are enabled by default. If you need to use a specific region that is not enabled, follow the steps below to enable it.
- Log in to the AWS Console.
- Click on the region dropdown located at the top right corner.
- Select "Manage Regions."
- Enable the desired region as shown below: