Azure Single Sign-on
Login into Azure Account with the required roles and permissions and follow the instructions below to set up SSO in Azure with RBAC:
- Navigate to Enterprise Applications and click
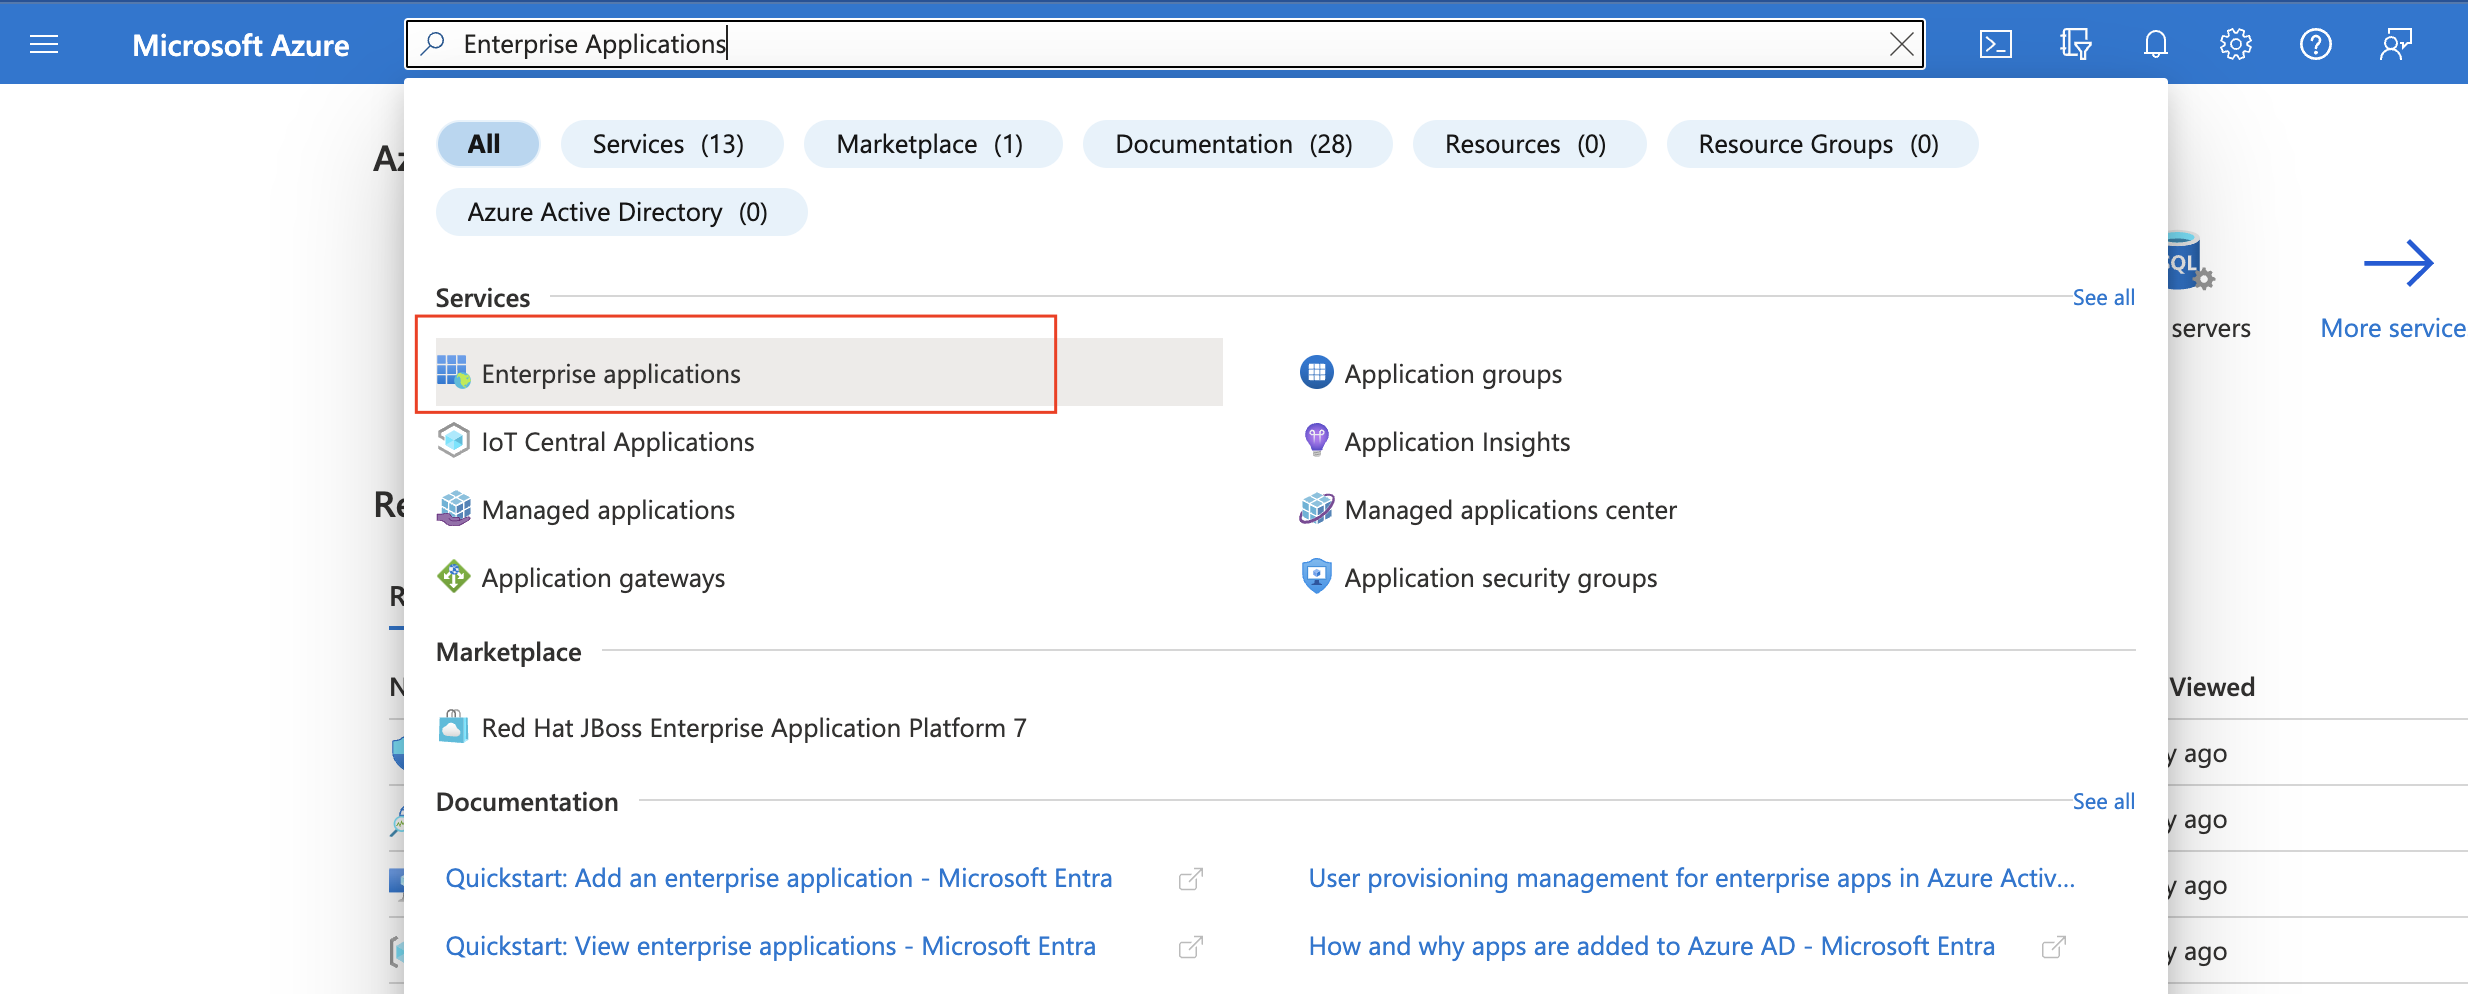
- Select “New Application”
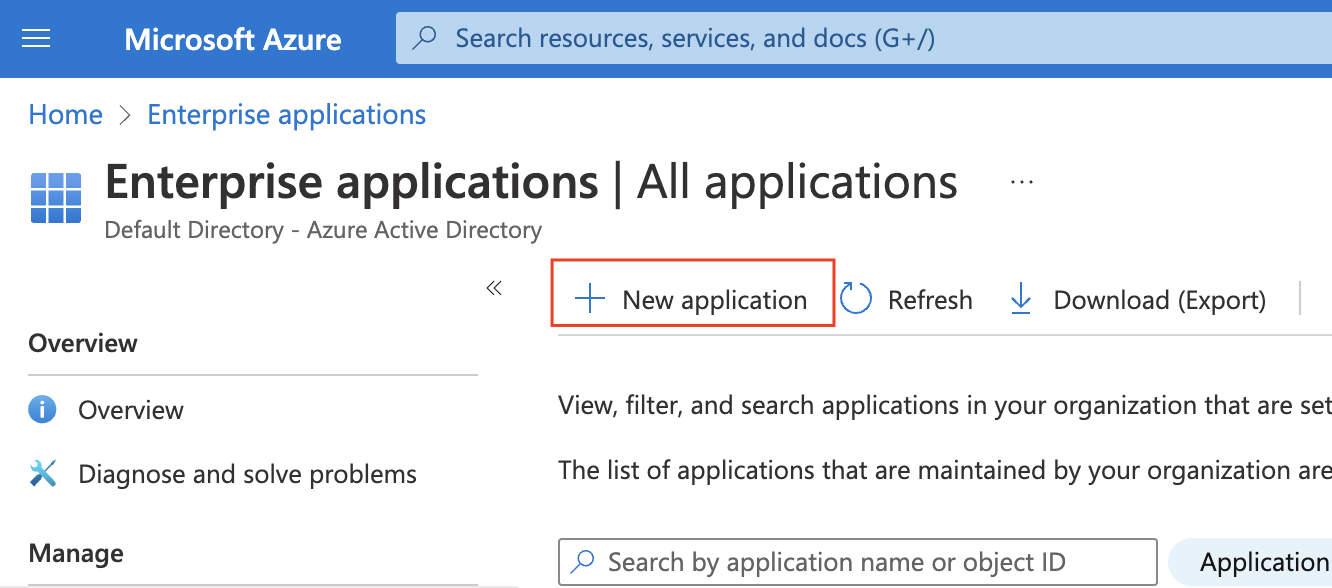
- Select “Create your application.”
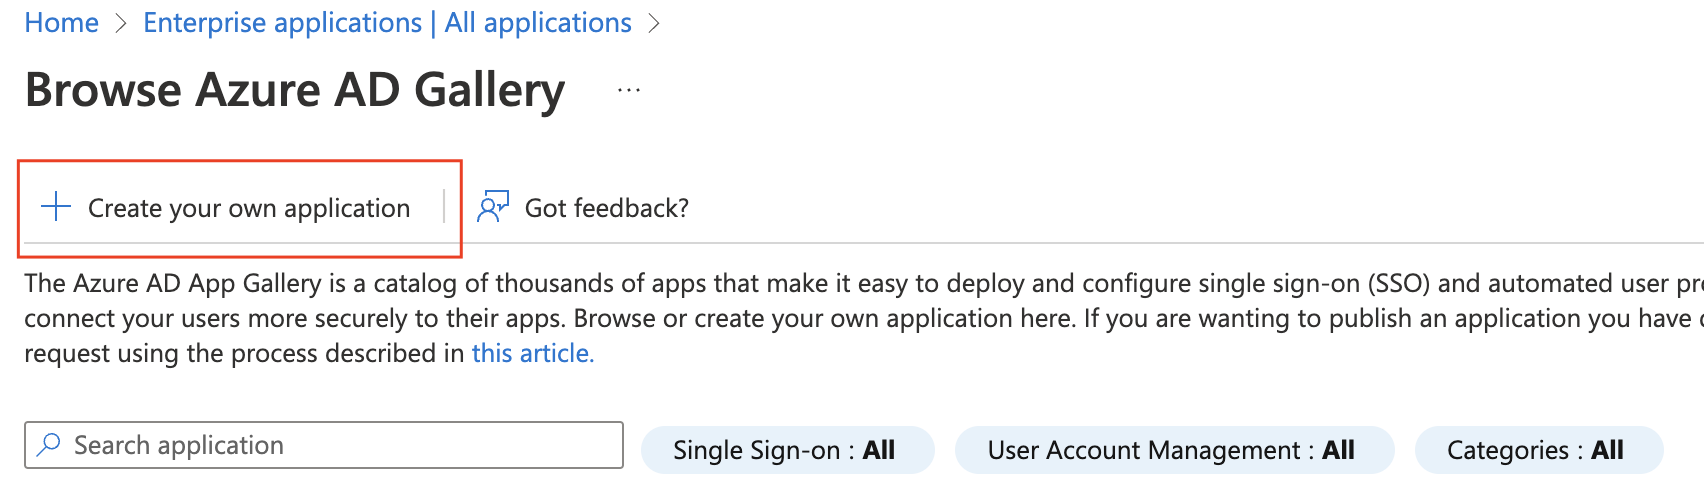
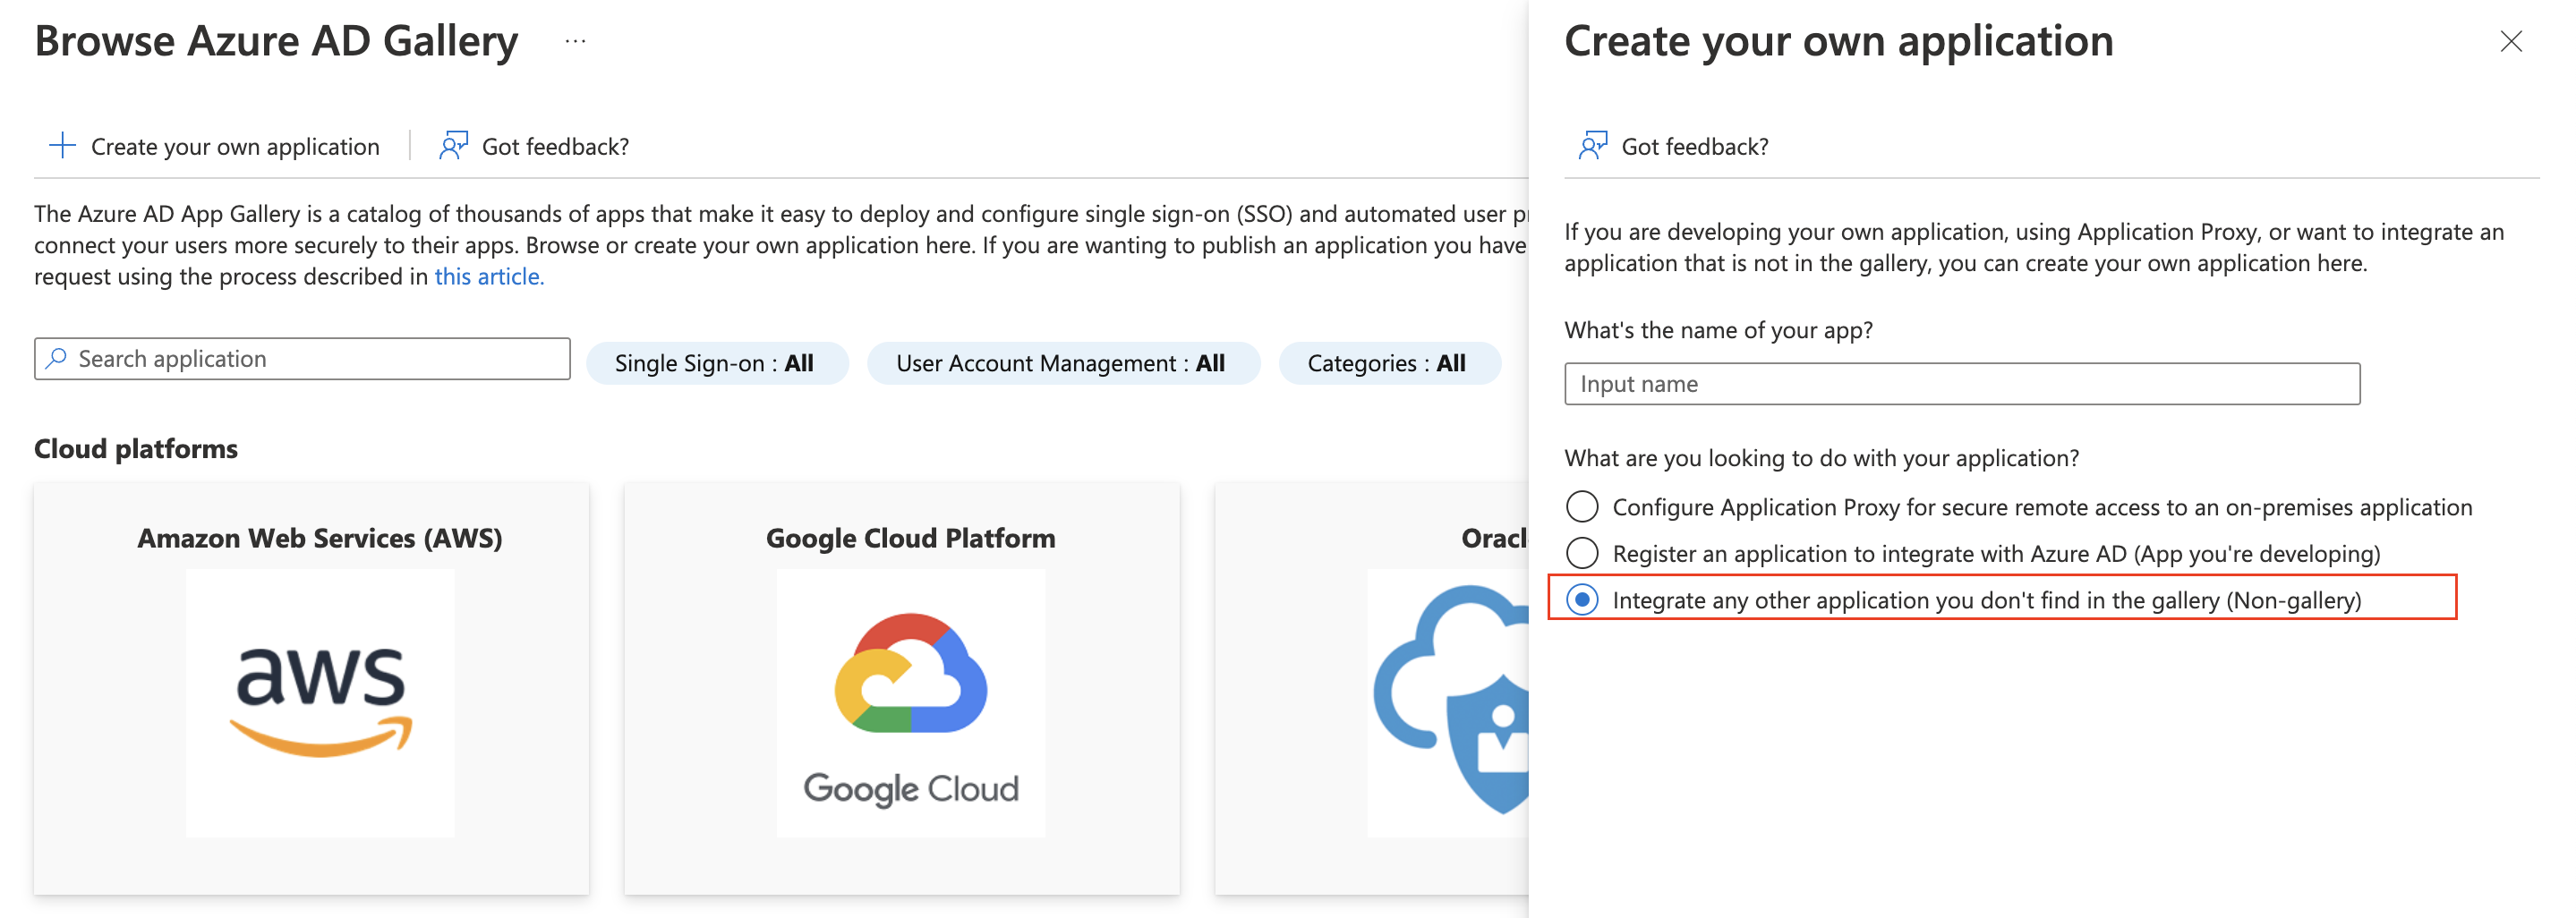
- Give the application a name and select the “Non-gallery” option
- Navigate to “Set up single sign-on.”
-
Select SAML
-
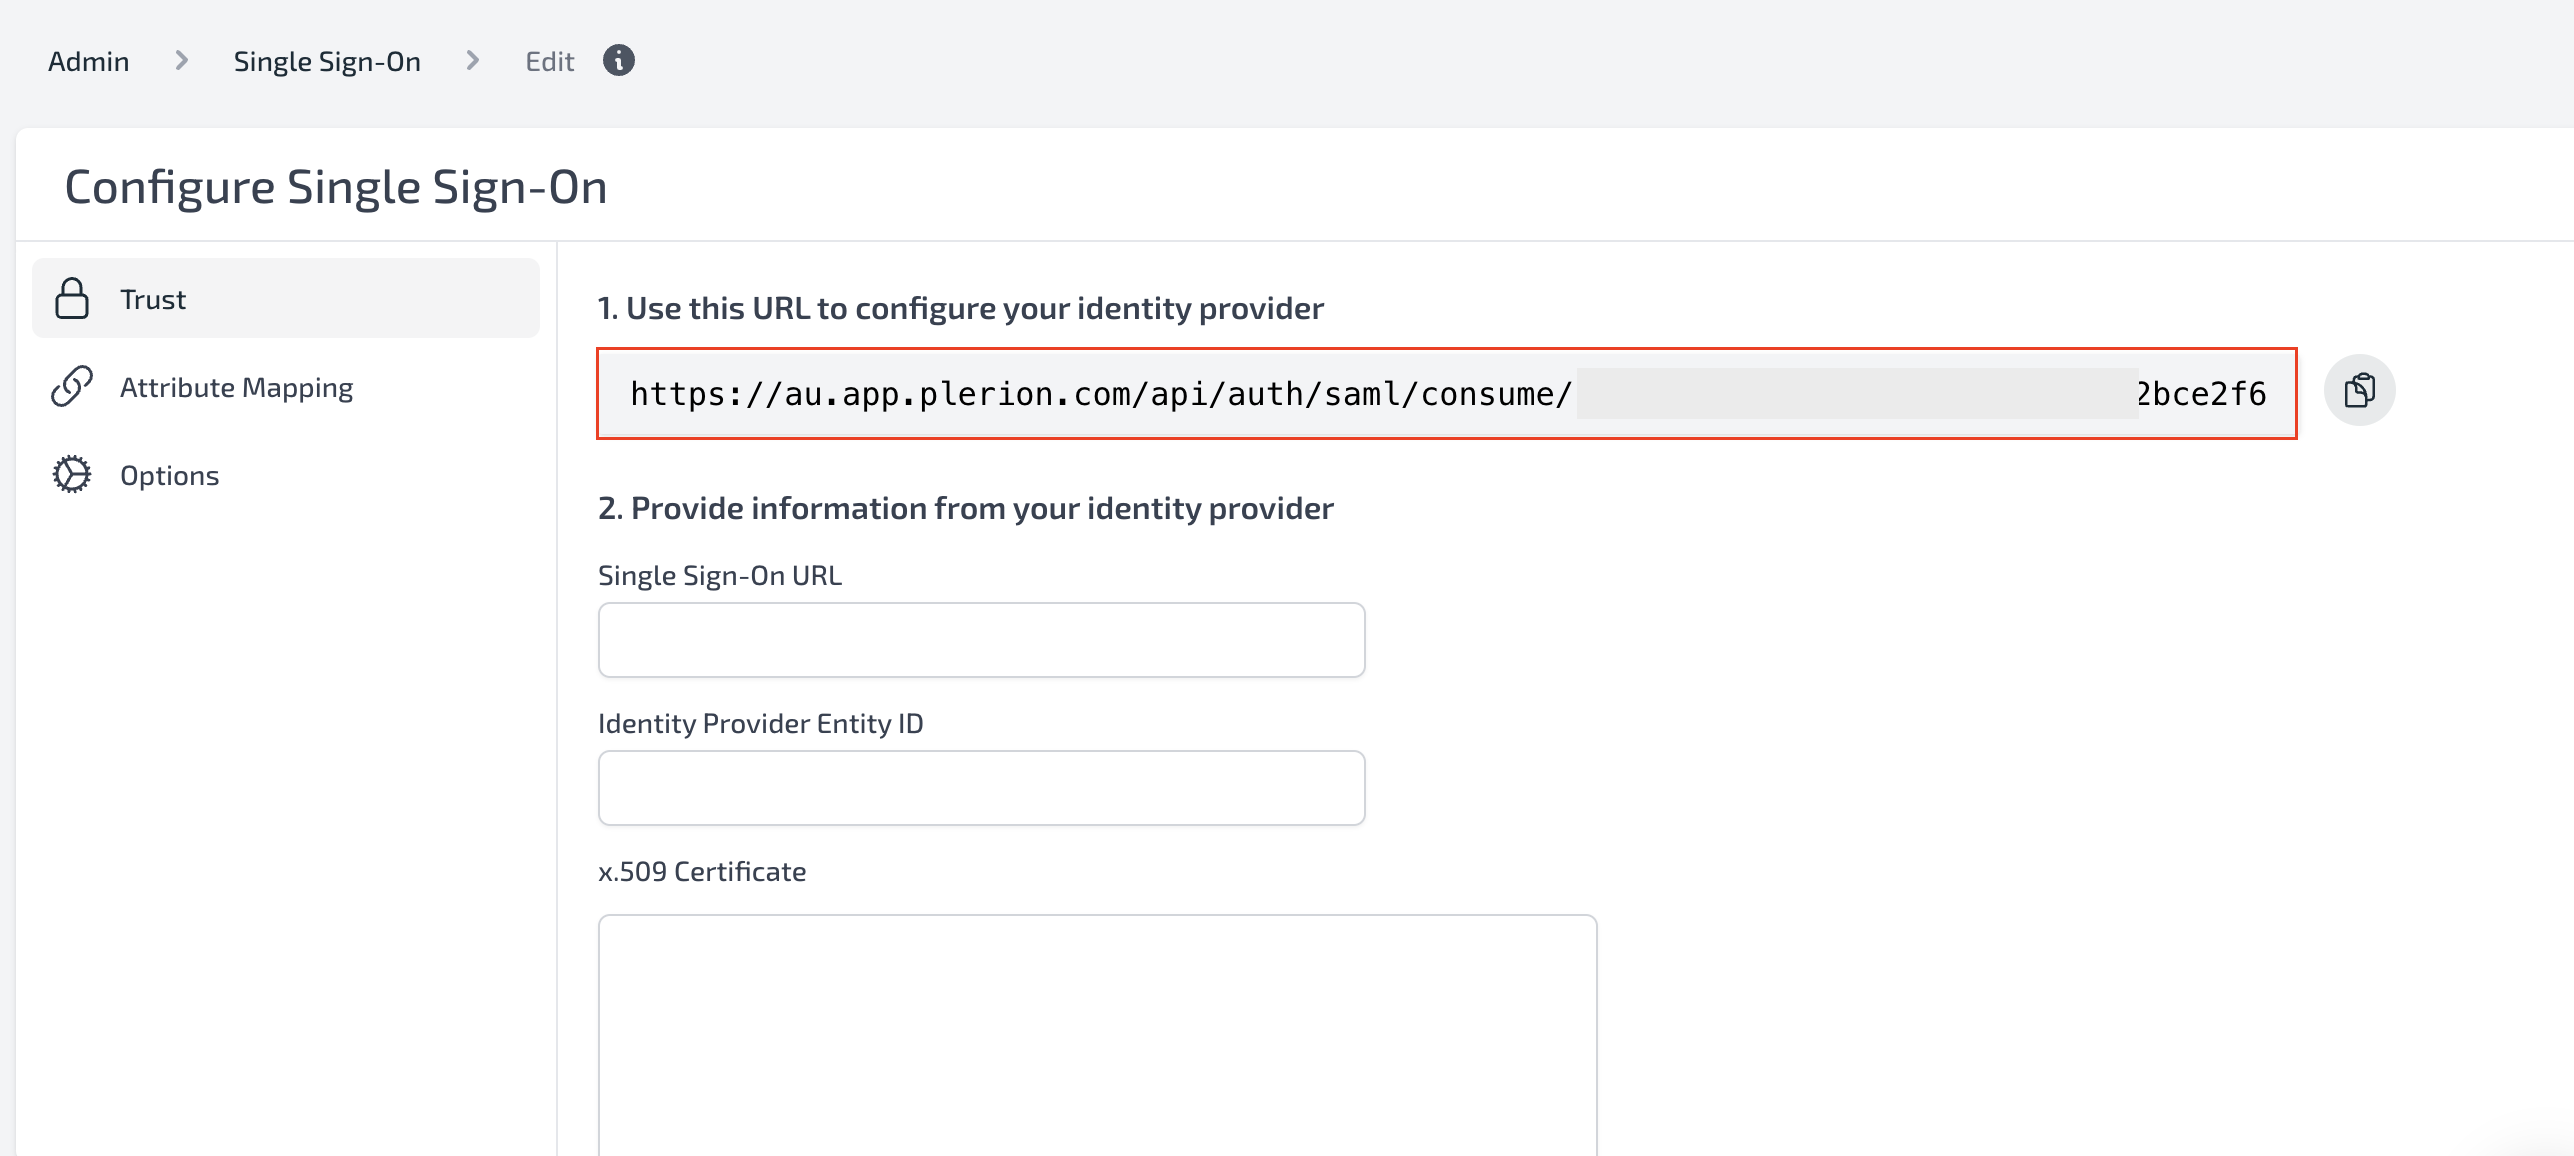
Go to Plerion > Admin > Single Sign-on and copy the SSO URL presented there
- Back in Azure, In Single sign-on > Basic SAML Configuration, use the URL as both Entity ID and Reply URL (Assertion Consumer Service URL)
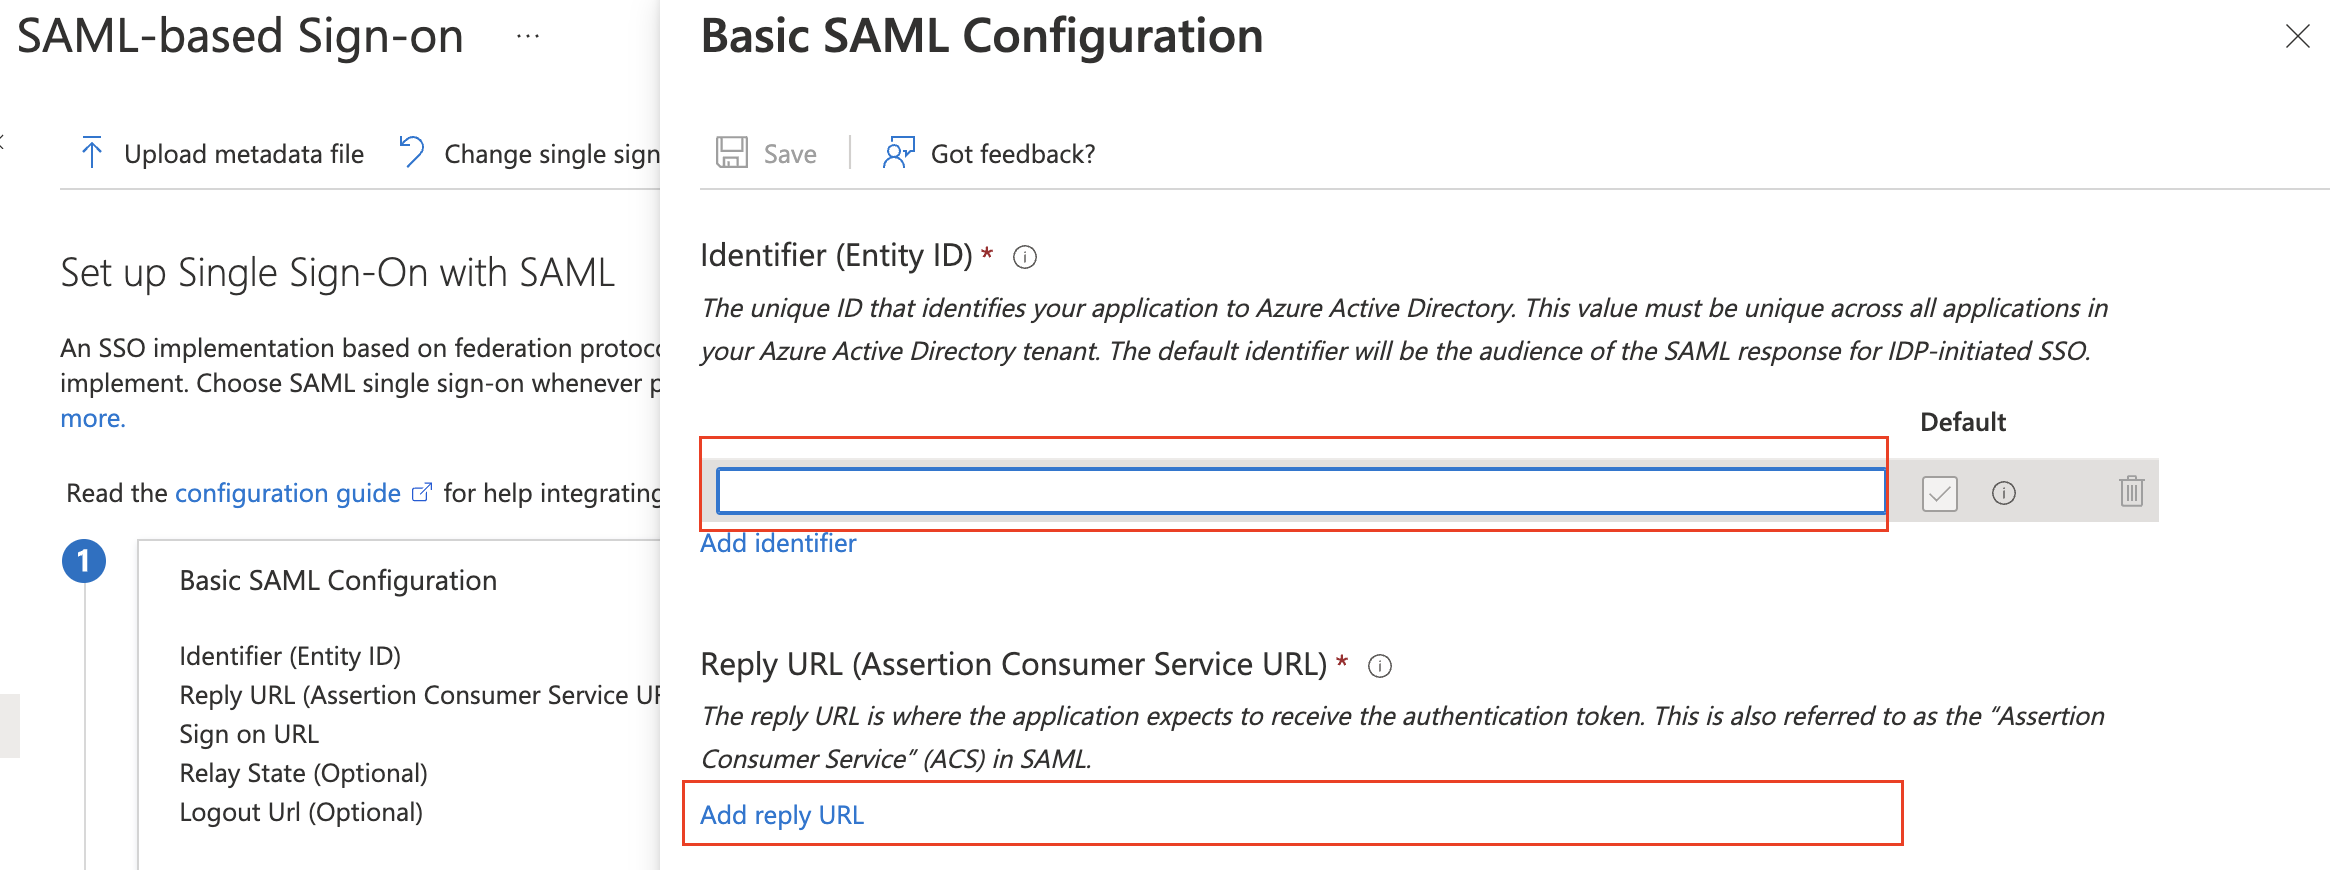
- Save the configuration
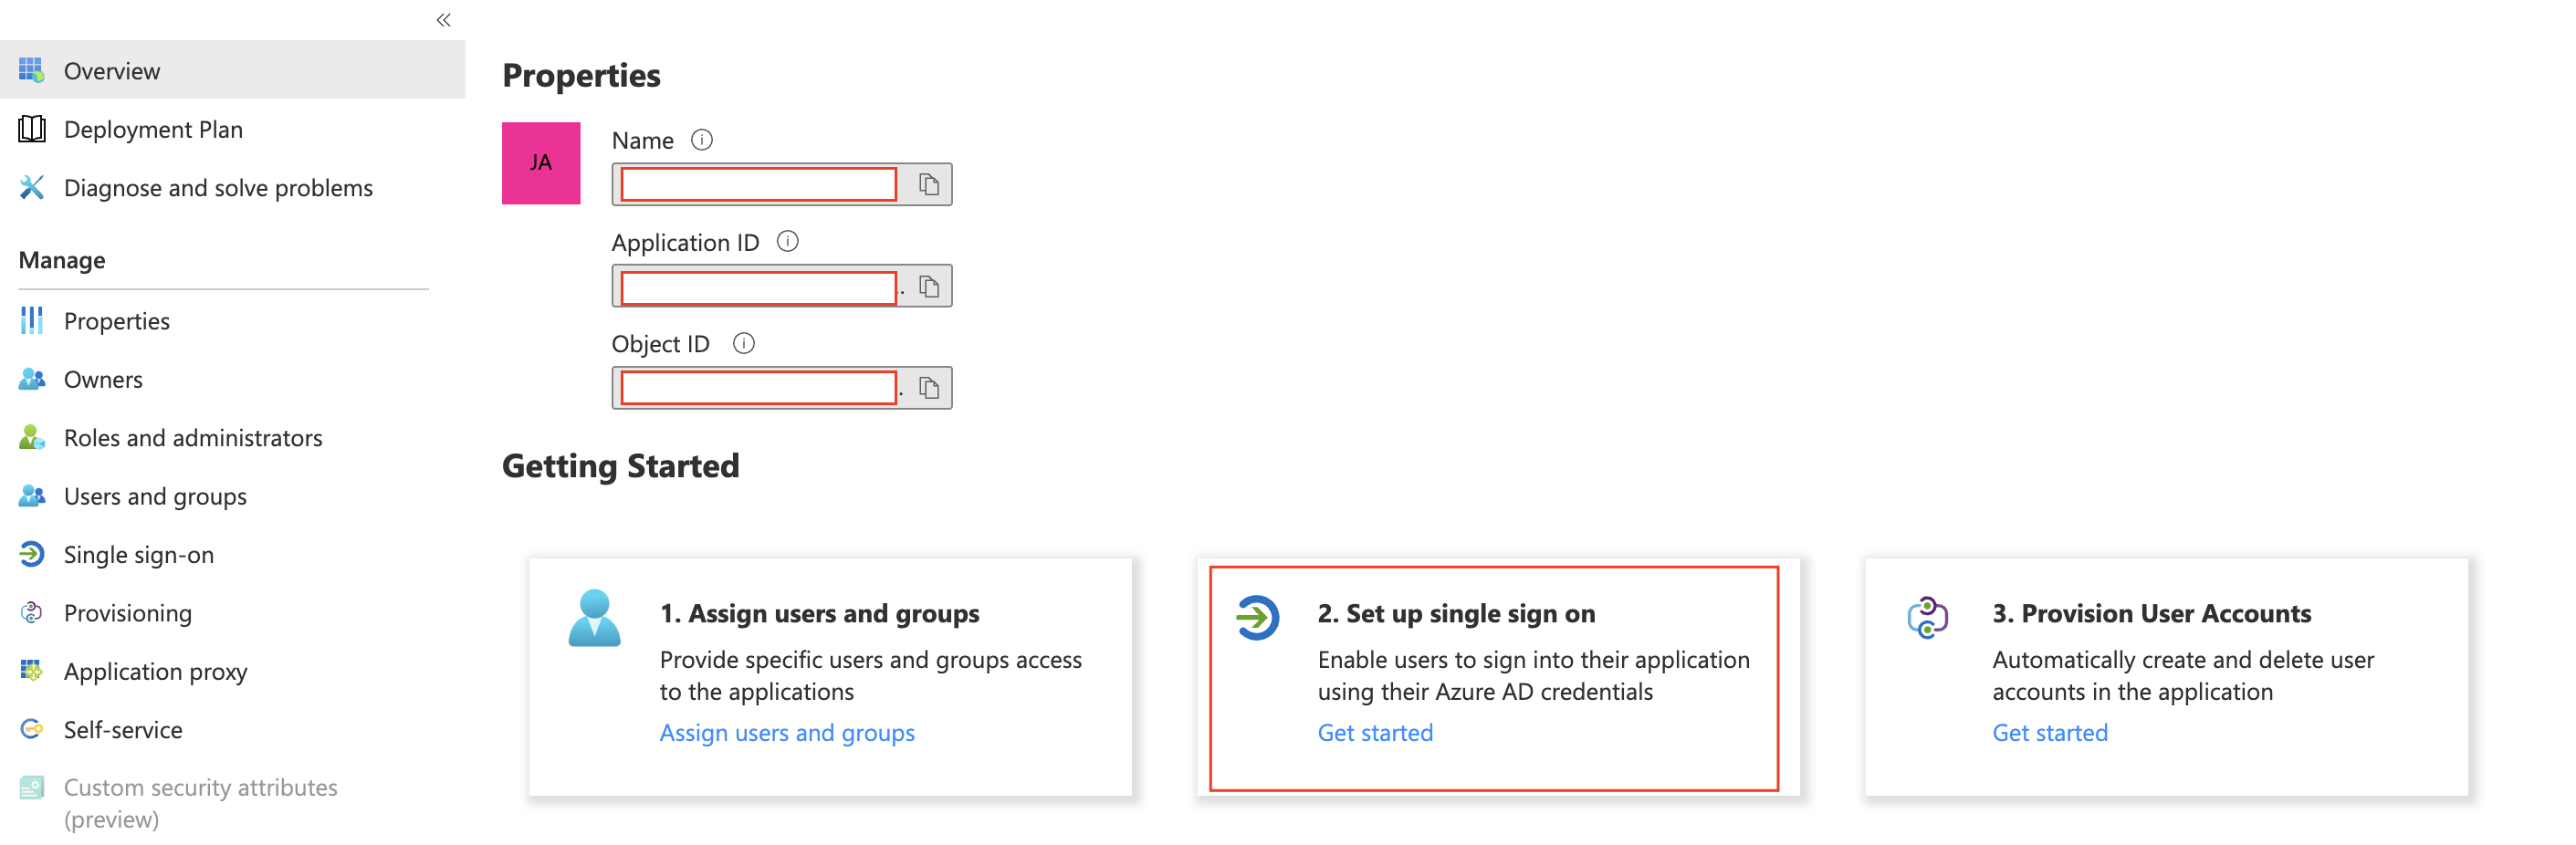
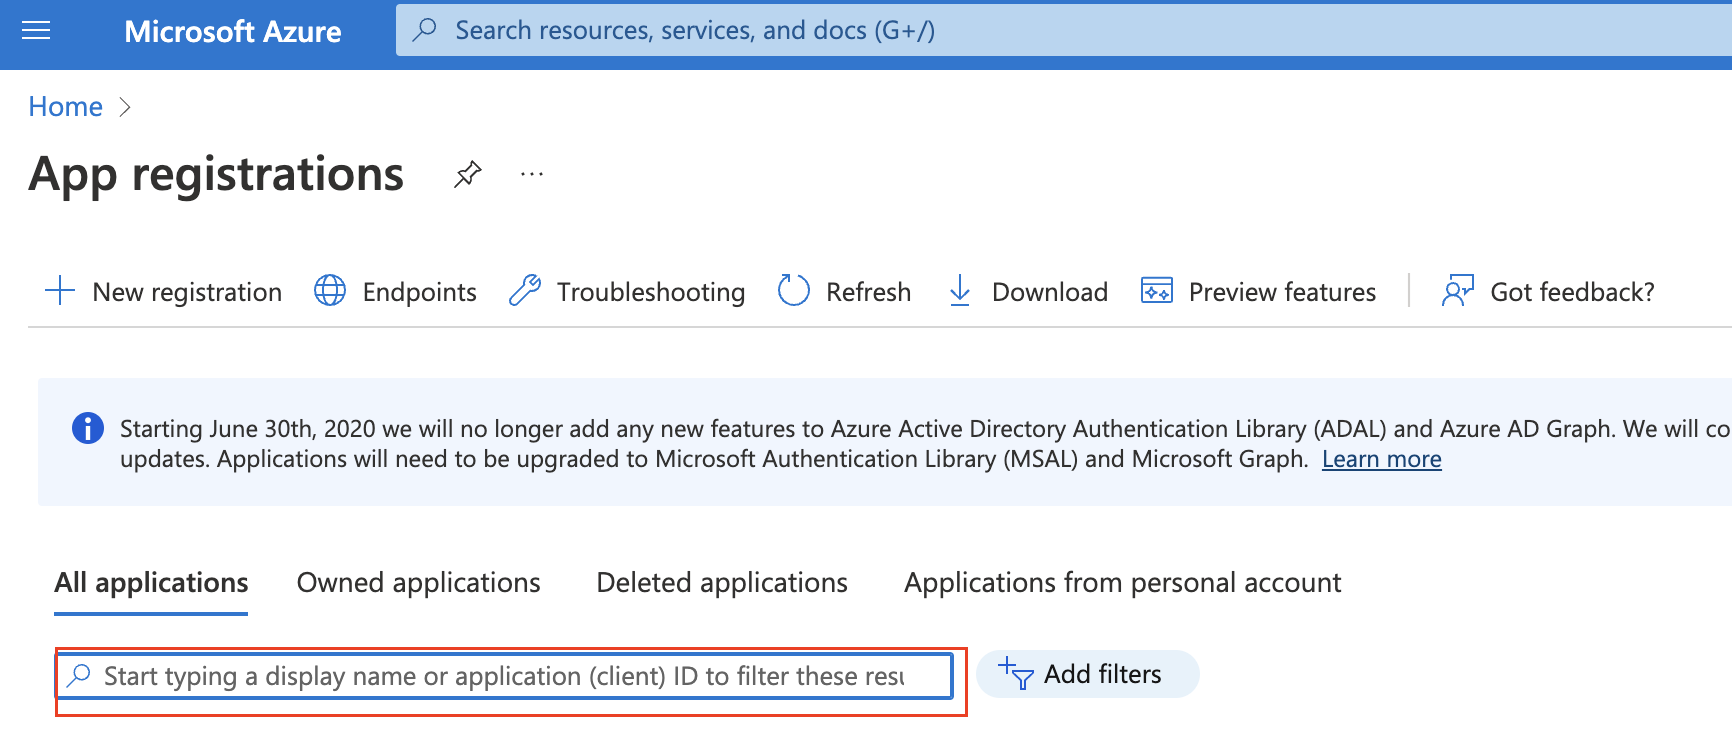
- Navigate to Azure > App Registrations, search for the newly created application and open it
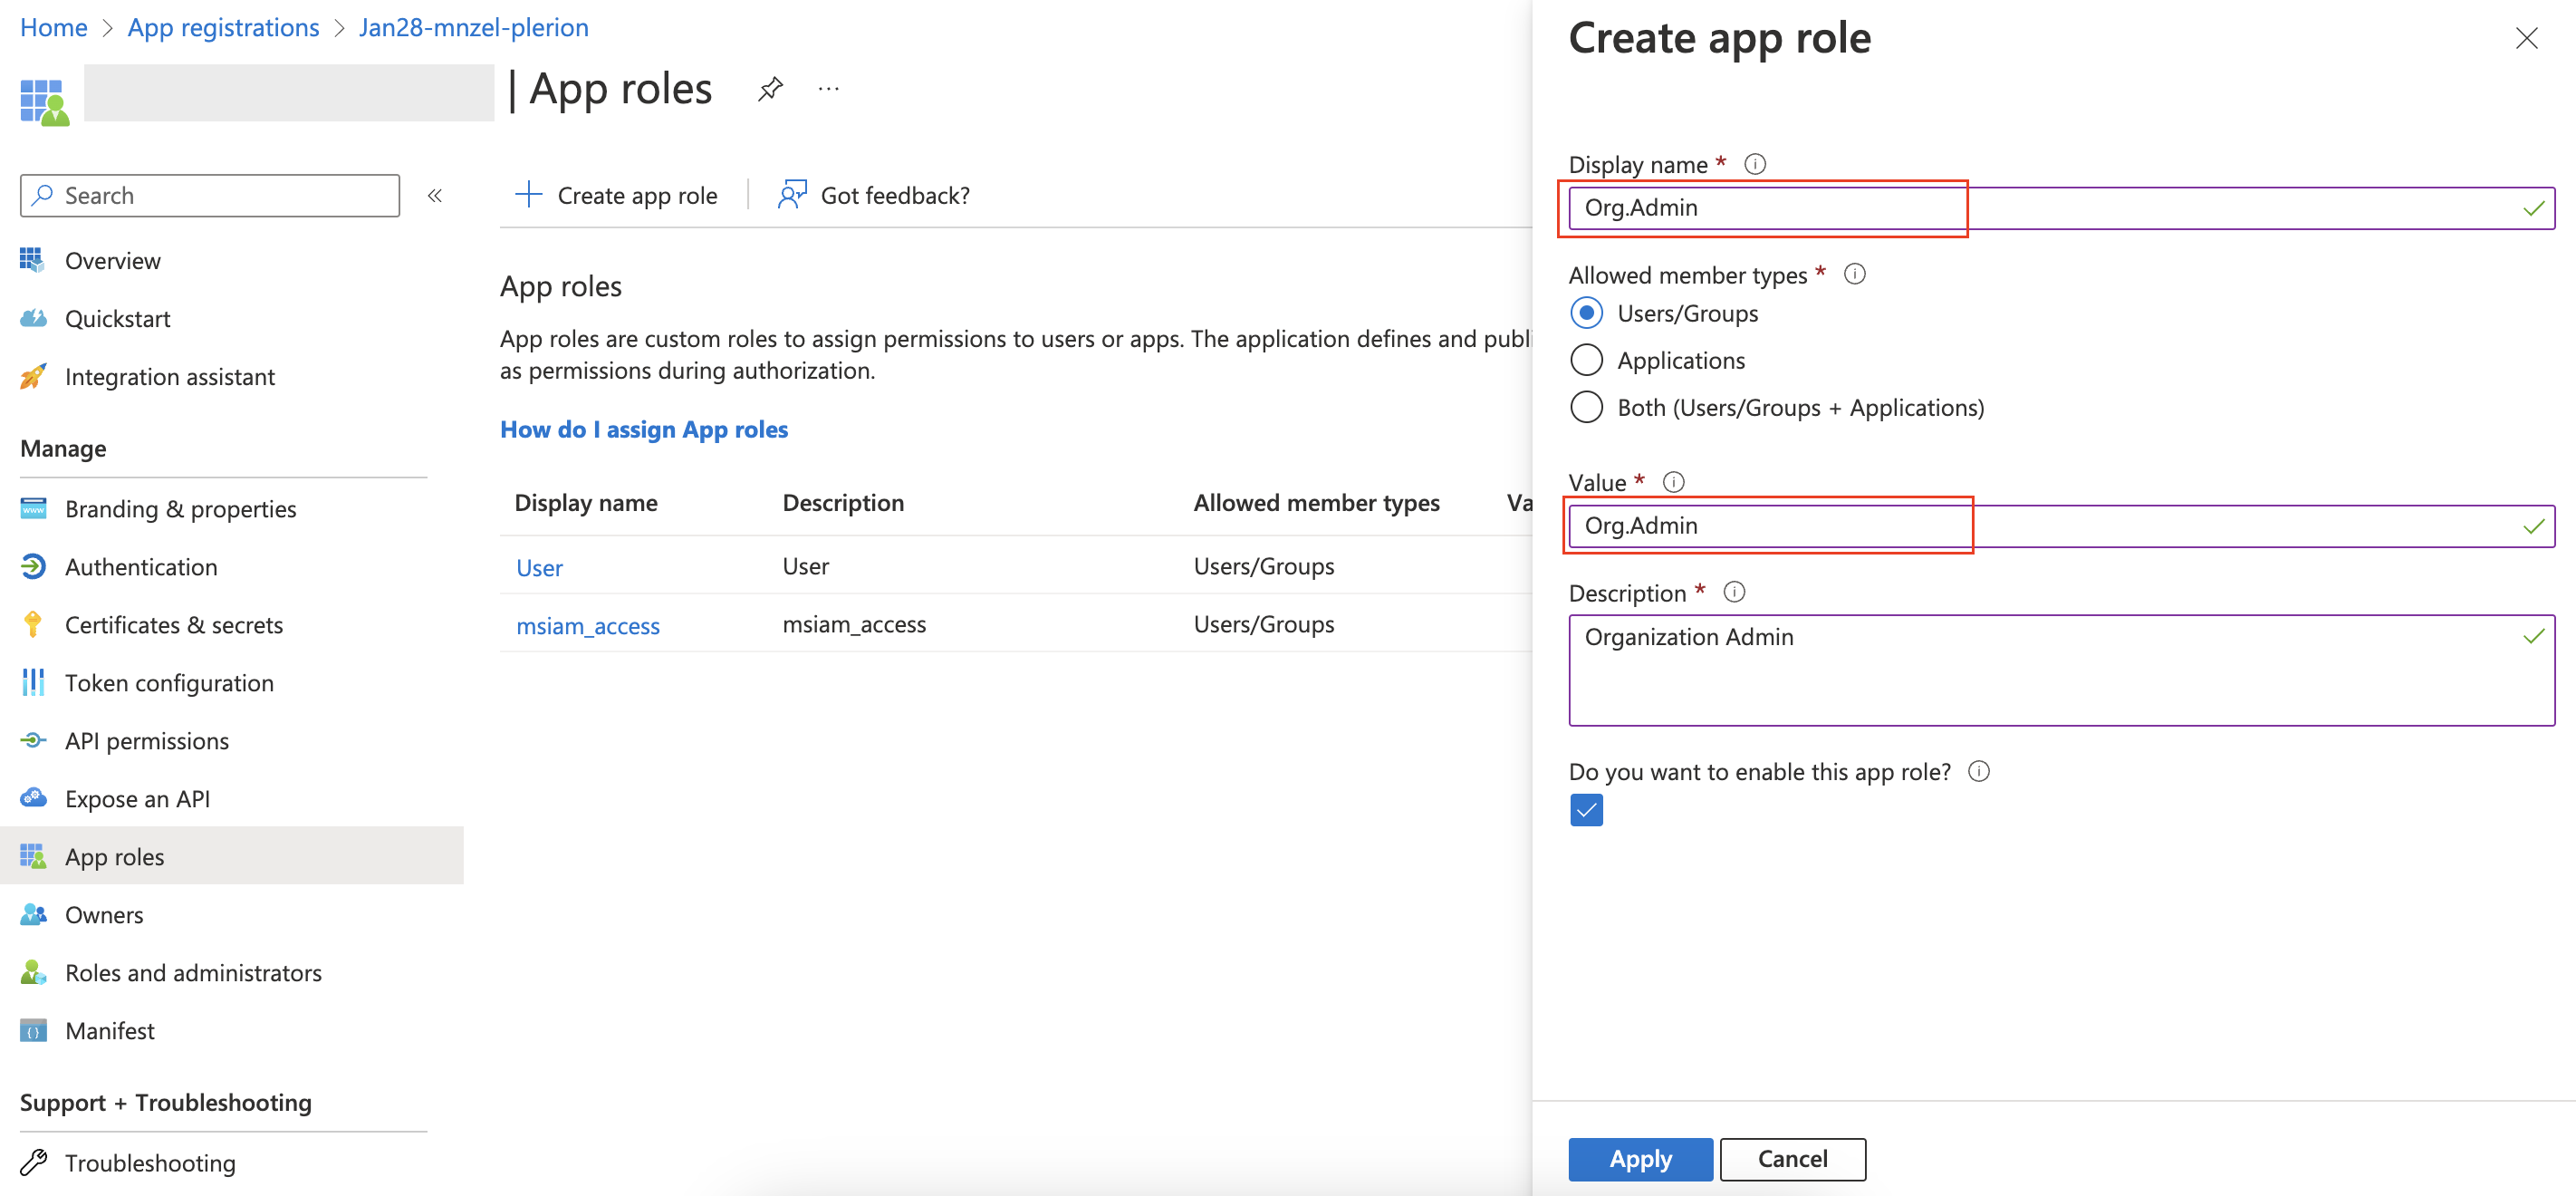
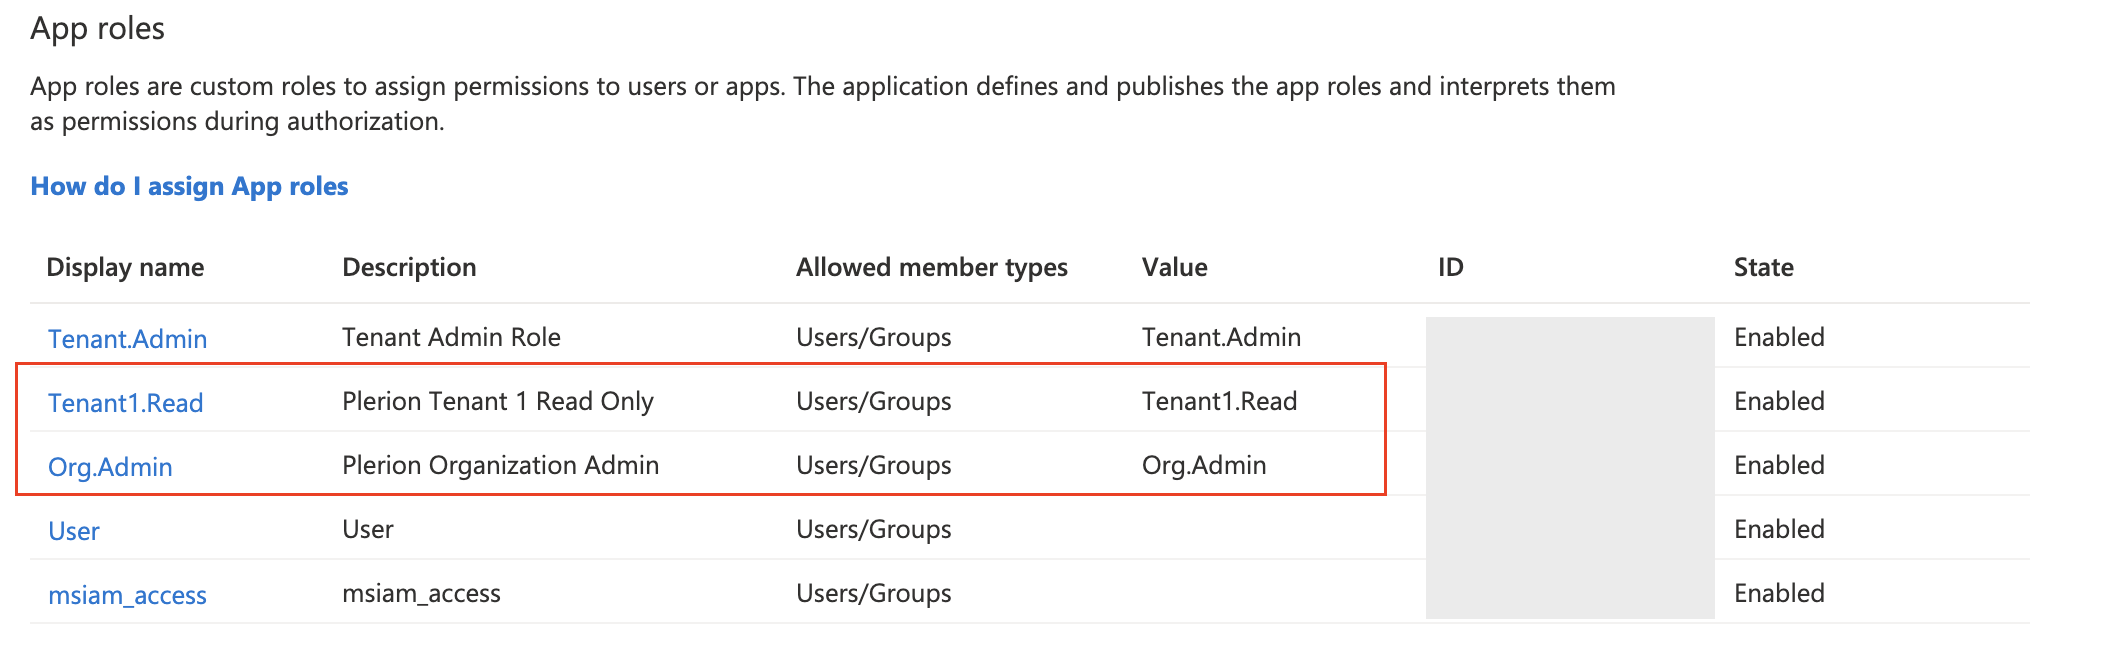
- Under “App roles”, create two new roles: “Org.Admin” and “Tenant1.Read”
-
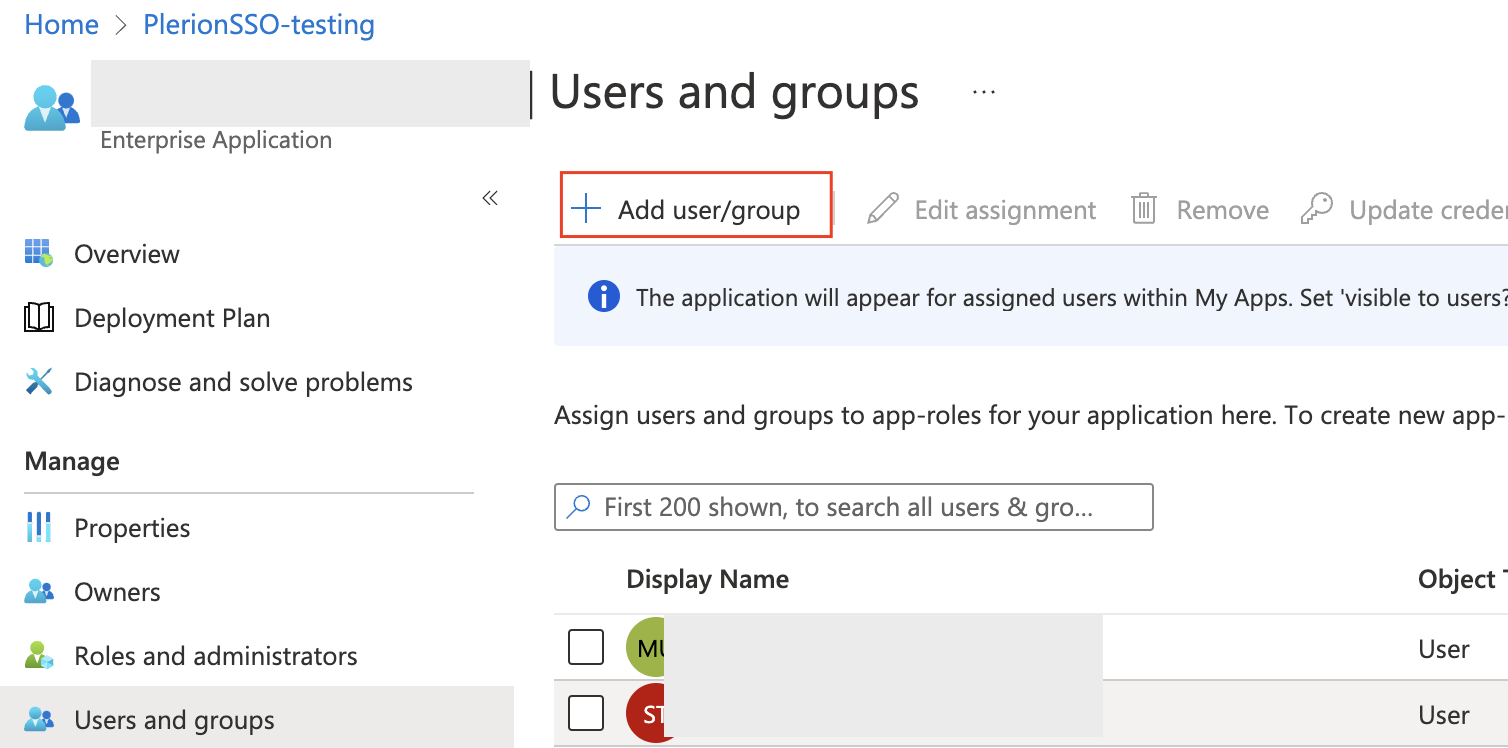
Go back to Azure > Enterprise Applications, search for the application, open it, and navigate to “Users and Groups”
-
Use “+ Add user/group” to add two new users. Under select a role, choose “Tenant1.Read” for one of them and “Org.Admin” for the other.
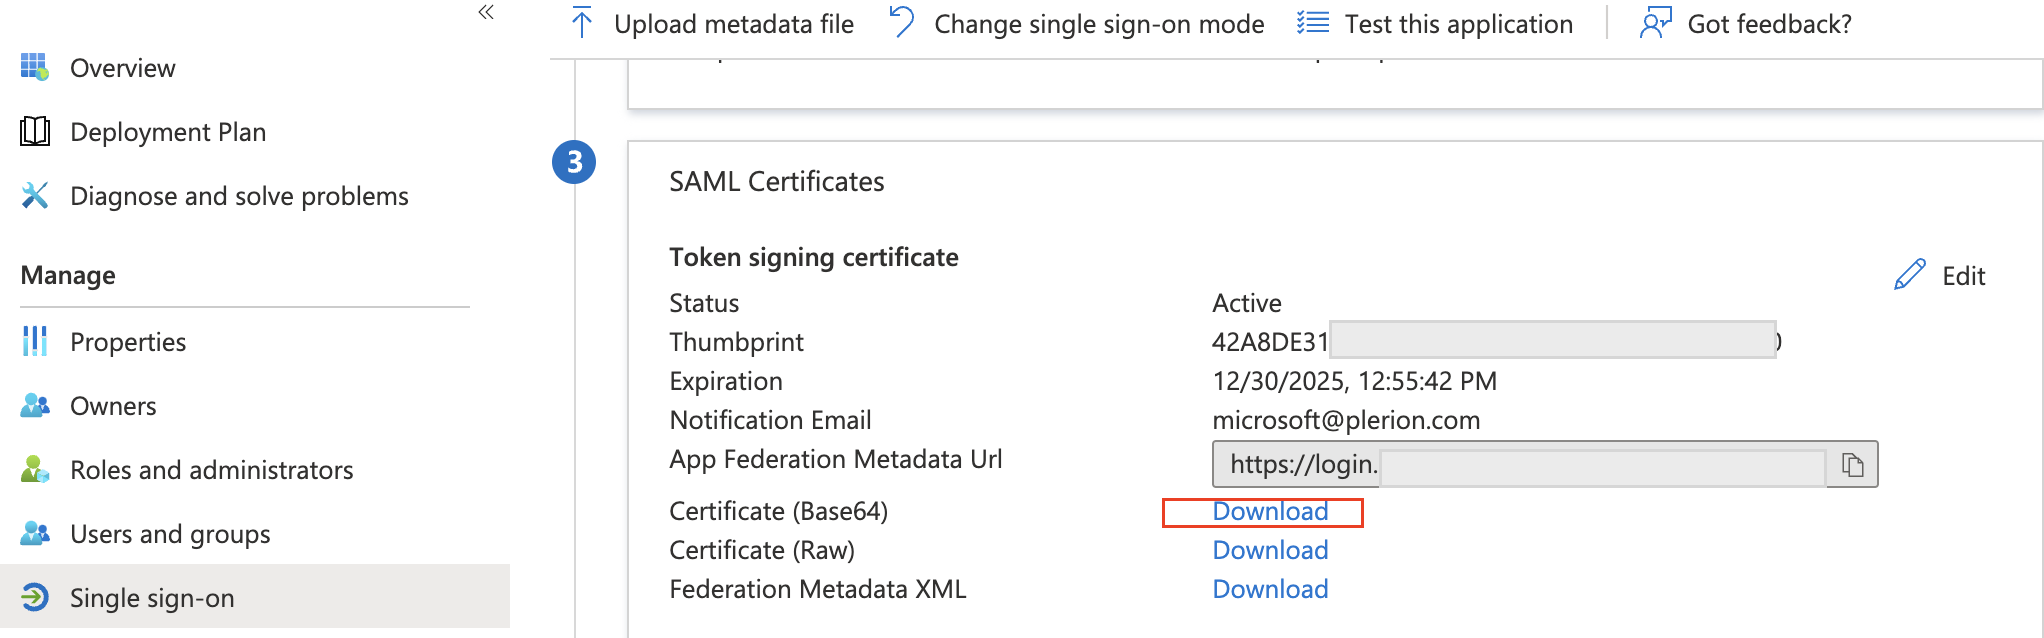
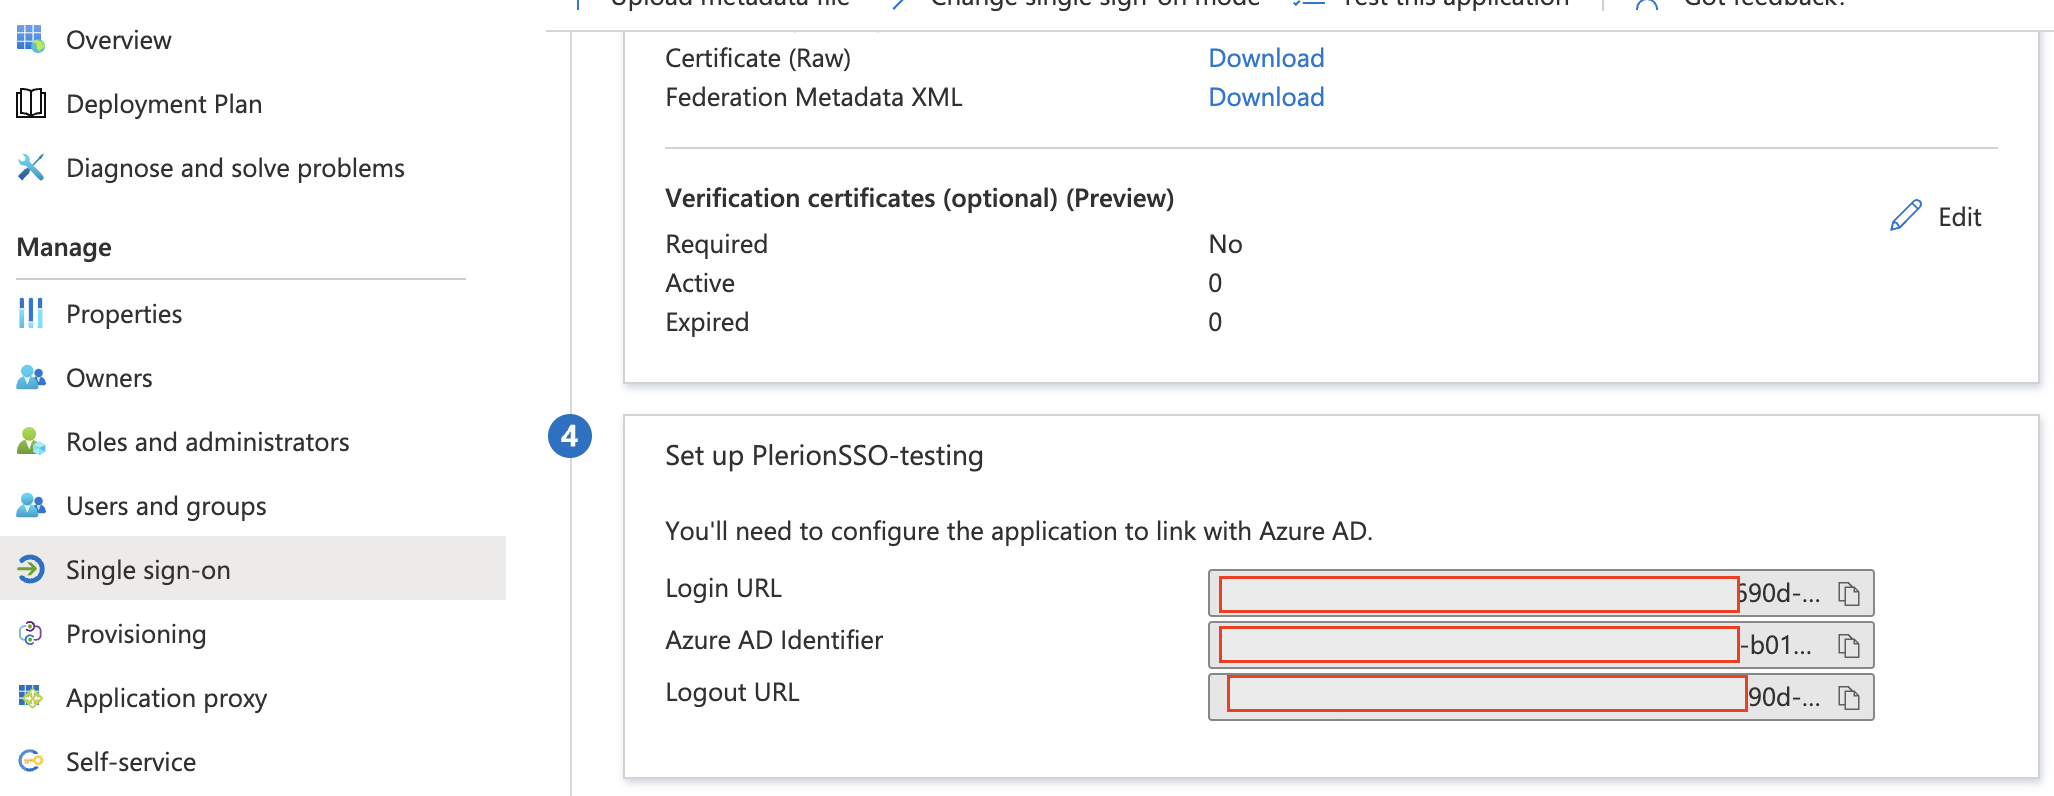
- Navigate to “Single sign-on”, download “Certificate (Base64)”
- Take note of “Login URL” and “Azure AD Identifier”
-
Go back to Plerion > Admin > SSO > edit > Trust tab.
-
Paste “Login URL” into the “Single Sign-On URL” field
-
Paste “Azure AD Identifier” into the “Identity Provider Entity ID” field
-
Paste the contents of the downloaded “Certificate (Base64)” file into x.509 Certificate field
-
Click “Configure” to save the configuration
-
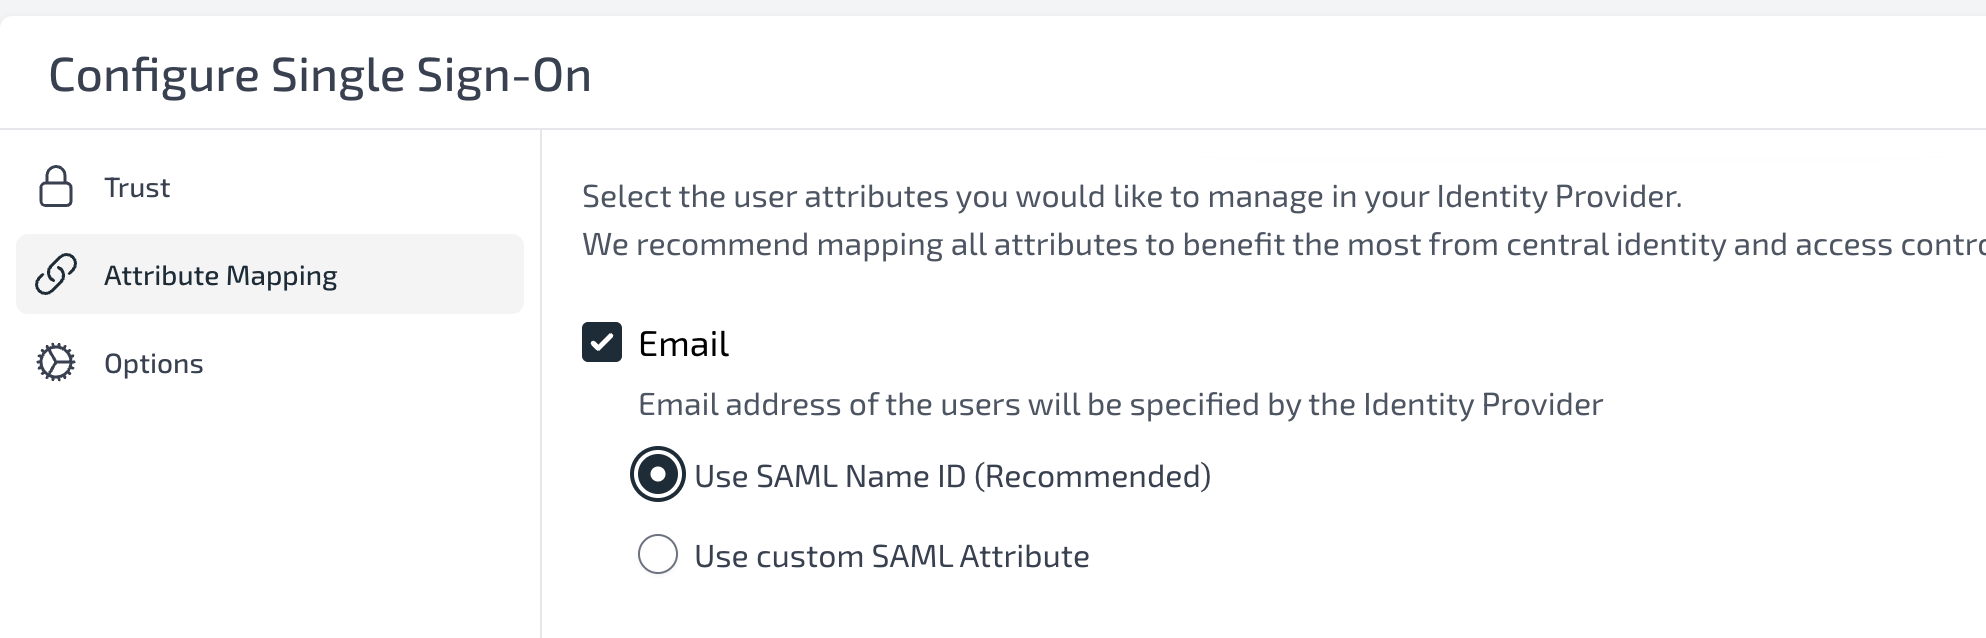
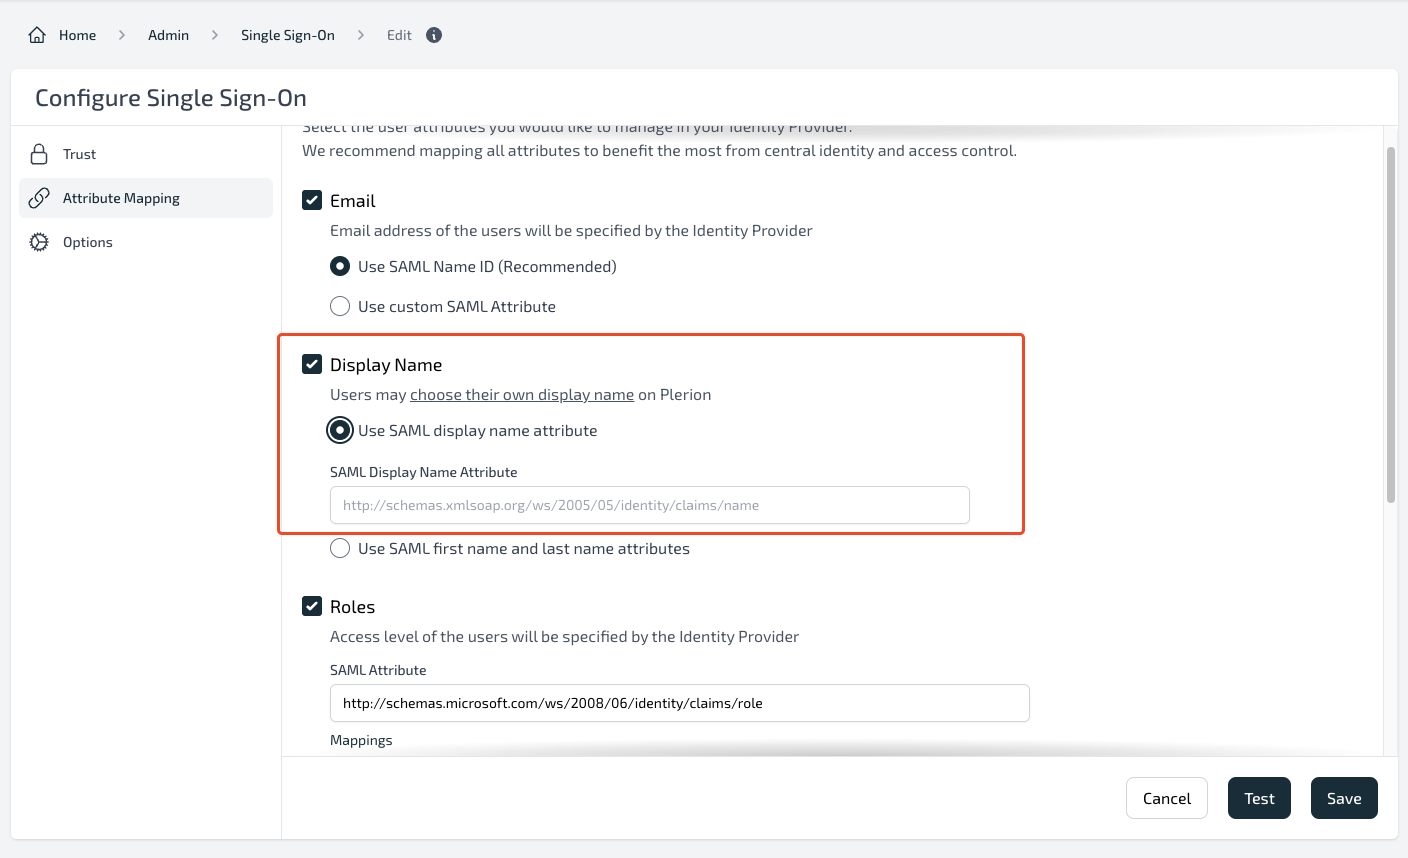
Navigate to “Attribute Mapping”
-
Select “Email”, and choose “Use SAML Name ID”
- On Display Name, if you want to allow users to choose their display name then leave this as unchecked. However, if you want to map the Azure display name, then click on it and configure the attribute statement.
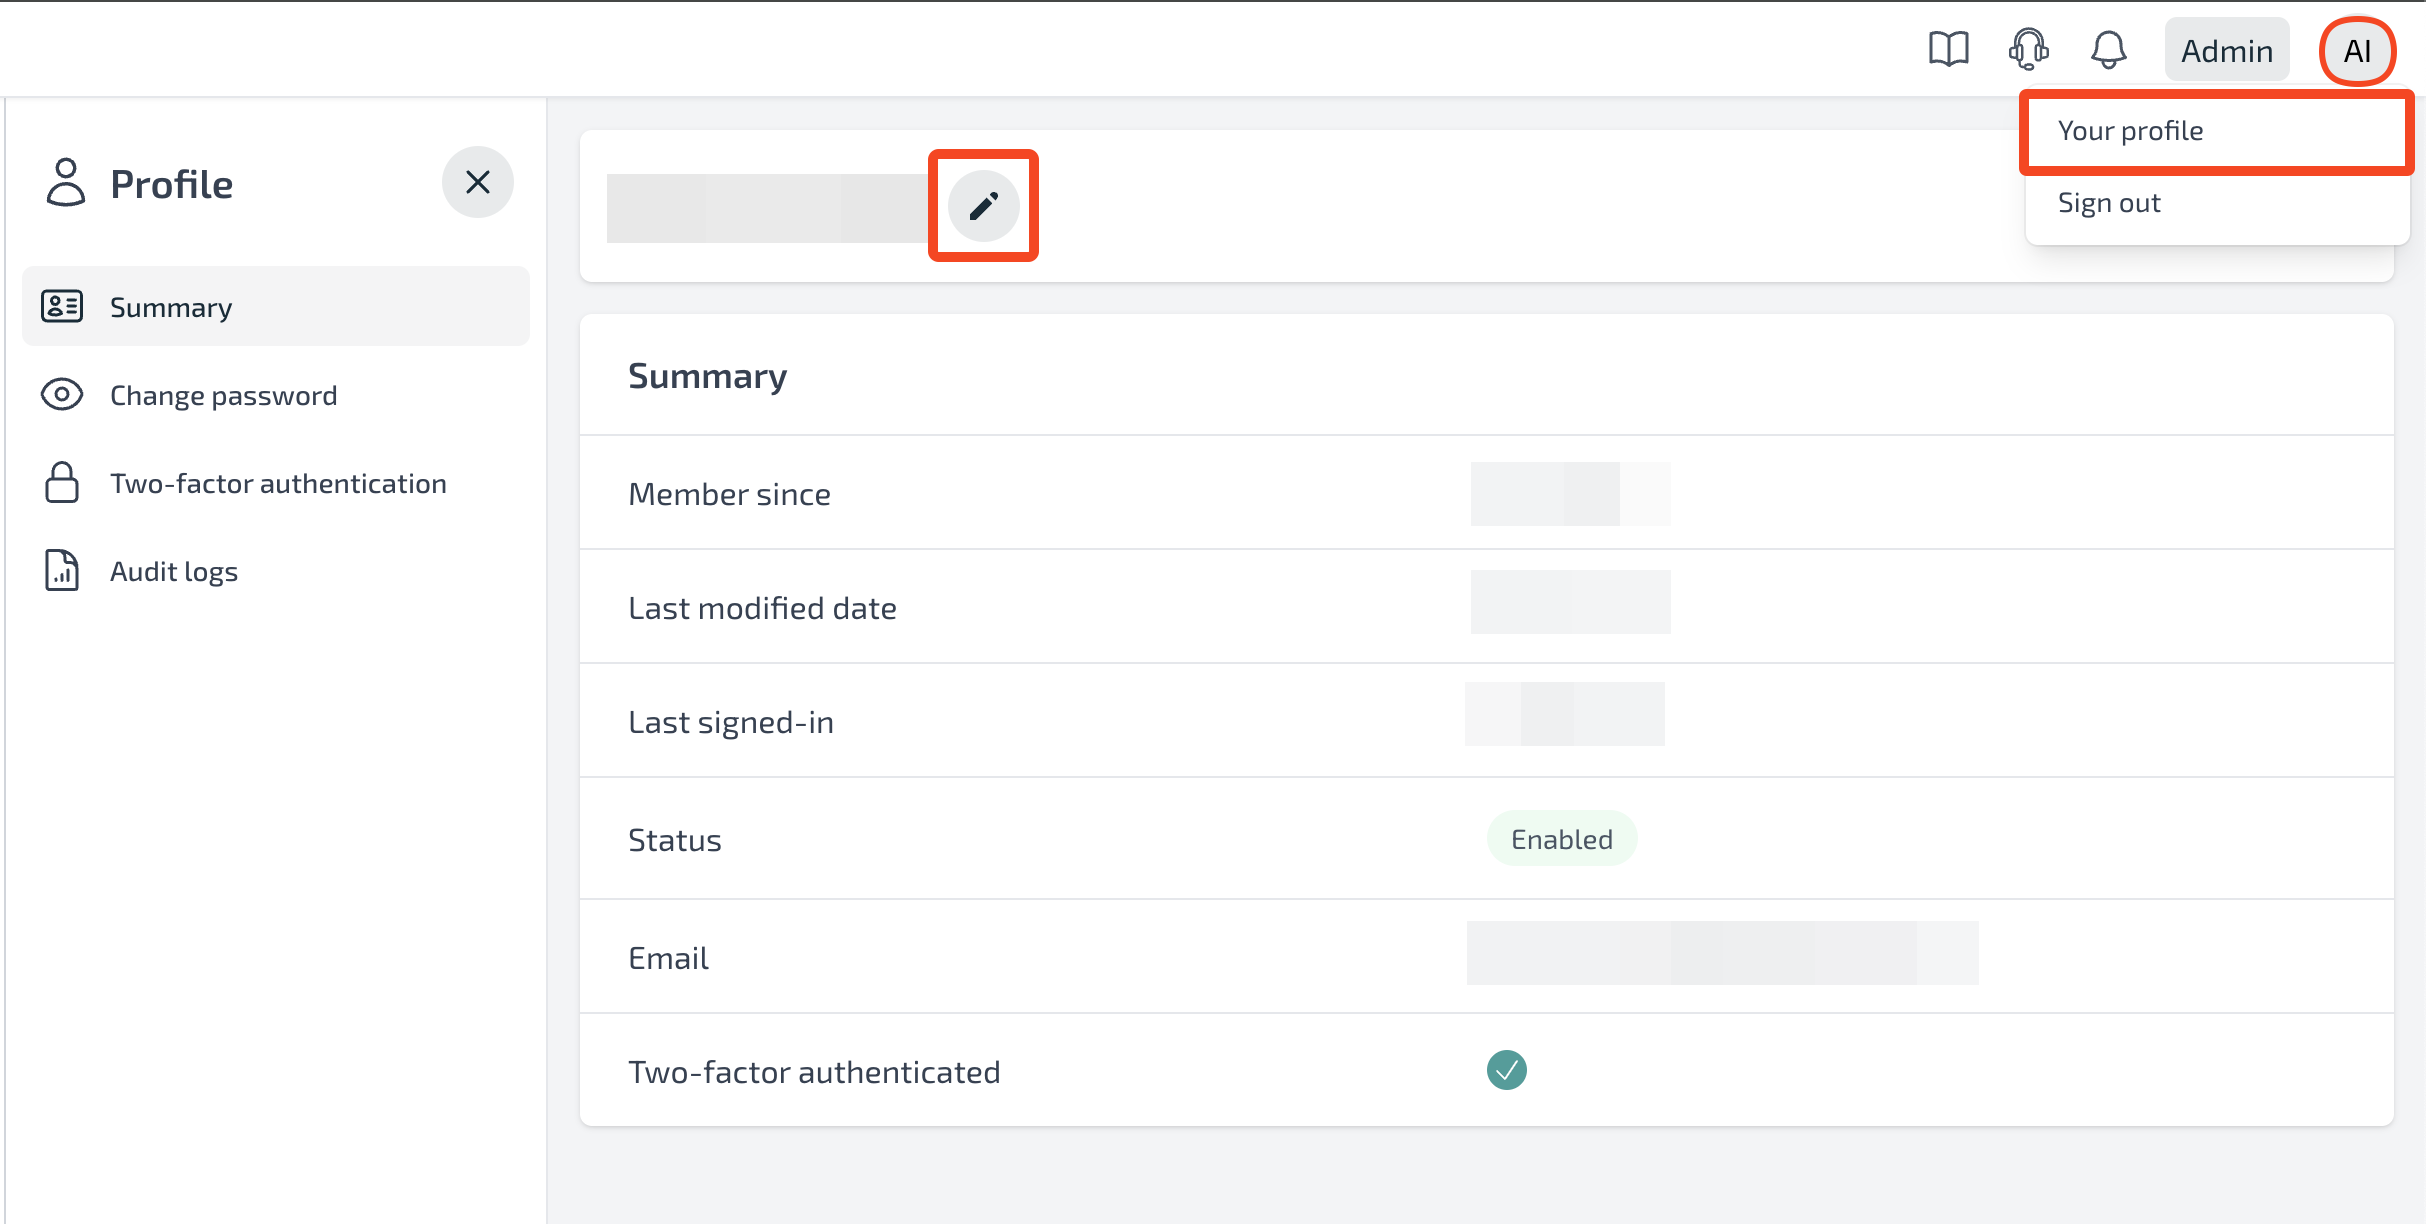
Note: Users can choose their display name by logging into their account and navigating to their profile.
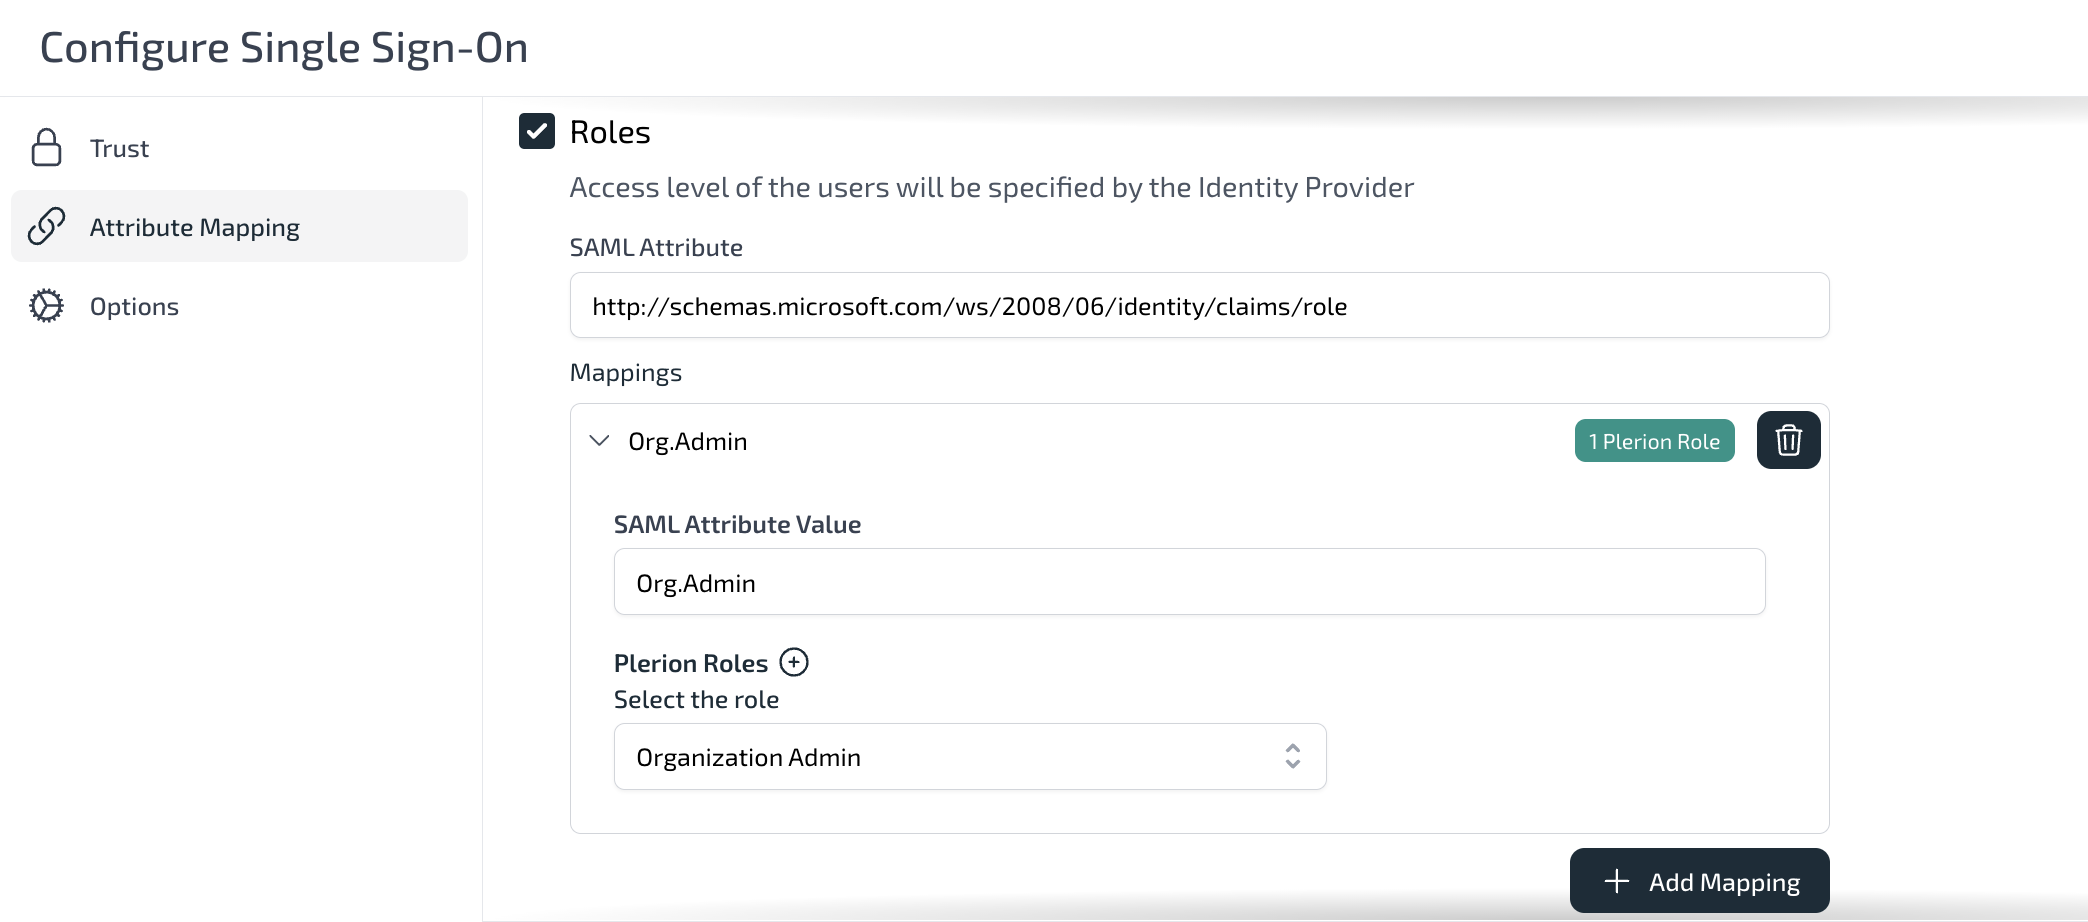
- Select “Roles” and set the following values:
- SAML Attribute:
http://schemas.microsoft.com/ws/2008/06/identity/claims/role - Attribute Value:
Org.AdminandTenant1.Read - Select appropriate Plerion roles for each Attribute Value Mapping.
- In a new browser session, open: My Apps (opens in a new tab) and sign in using one of the users added to the application.