Linking target accounts to service account
After creating the service account, you have the option to link it with your target accounts, specifically AWS account integrations. You can accomplish this either during the creation of a new target account or by modifying an existing one.
Creating a new target account
Onboarding Multiple AWS Account Integrations
To onboard multiple AWS account integrations, follow the steps below:
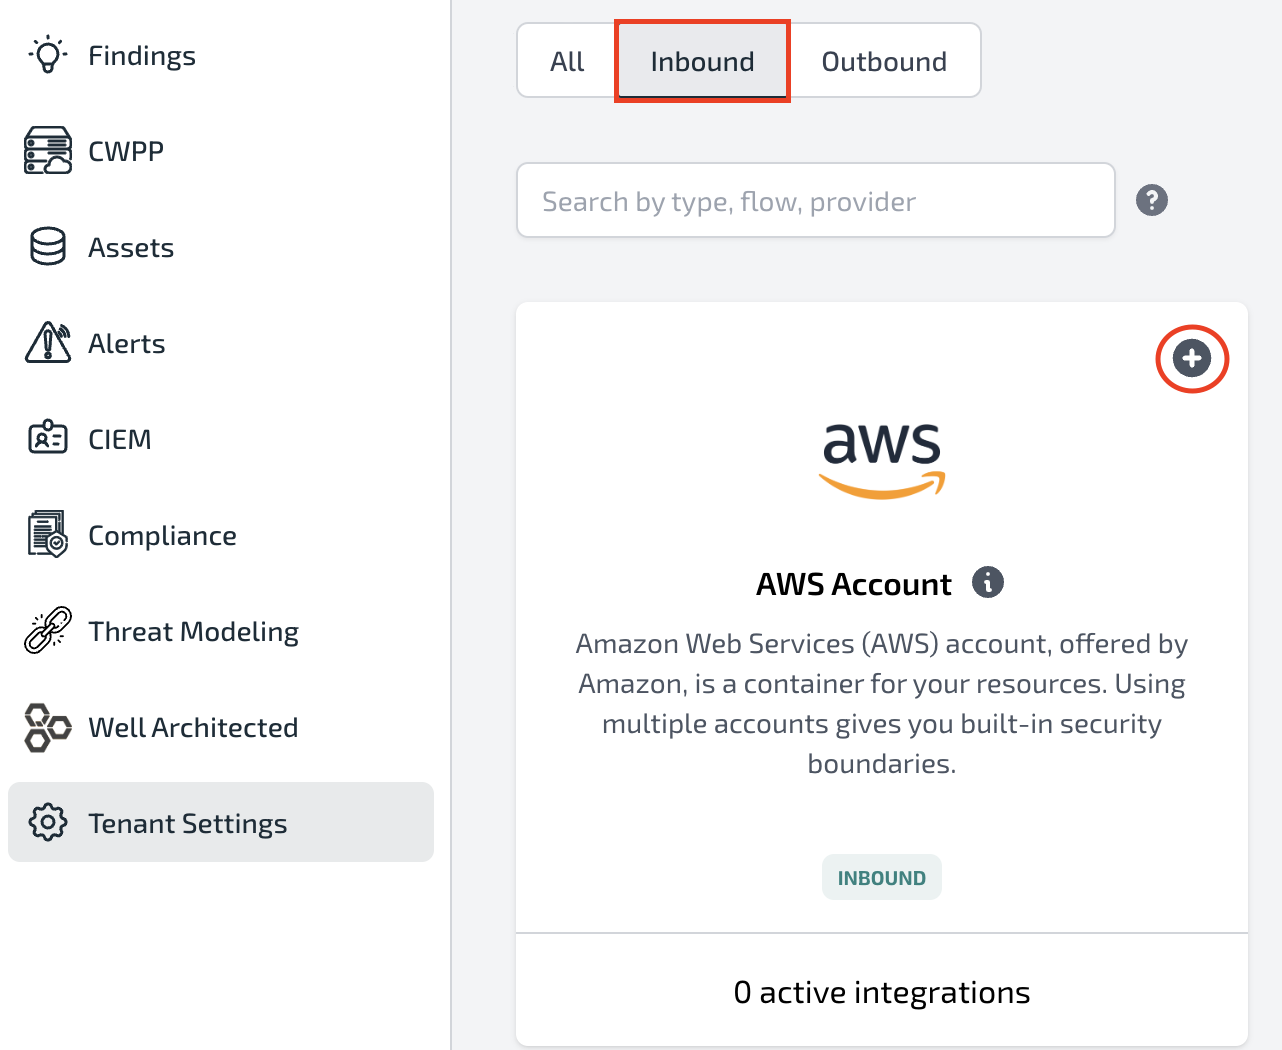
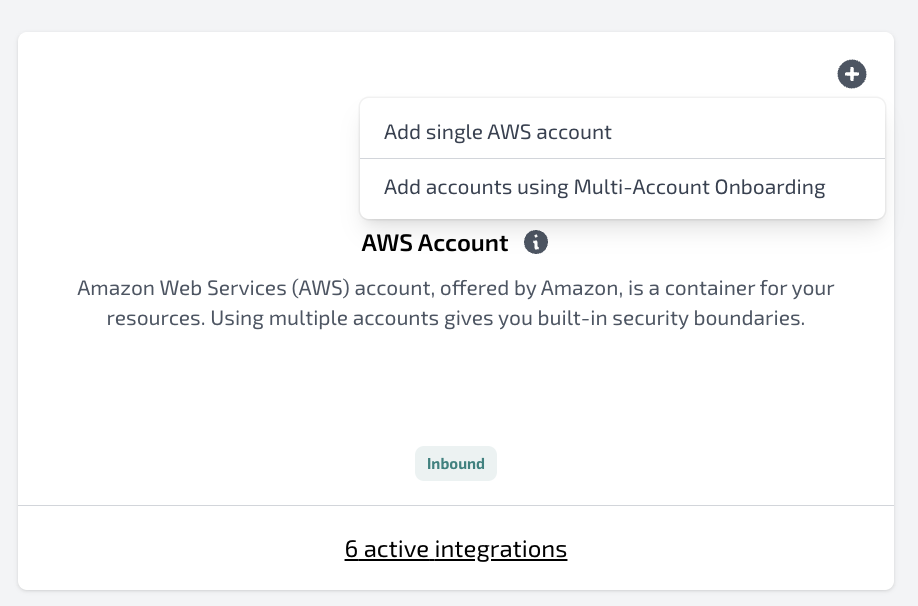
- Go to the Tenant Settings - Integrations section and click on the '+' button within the AWS Account widget.
-
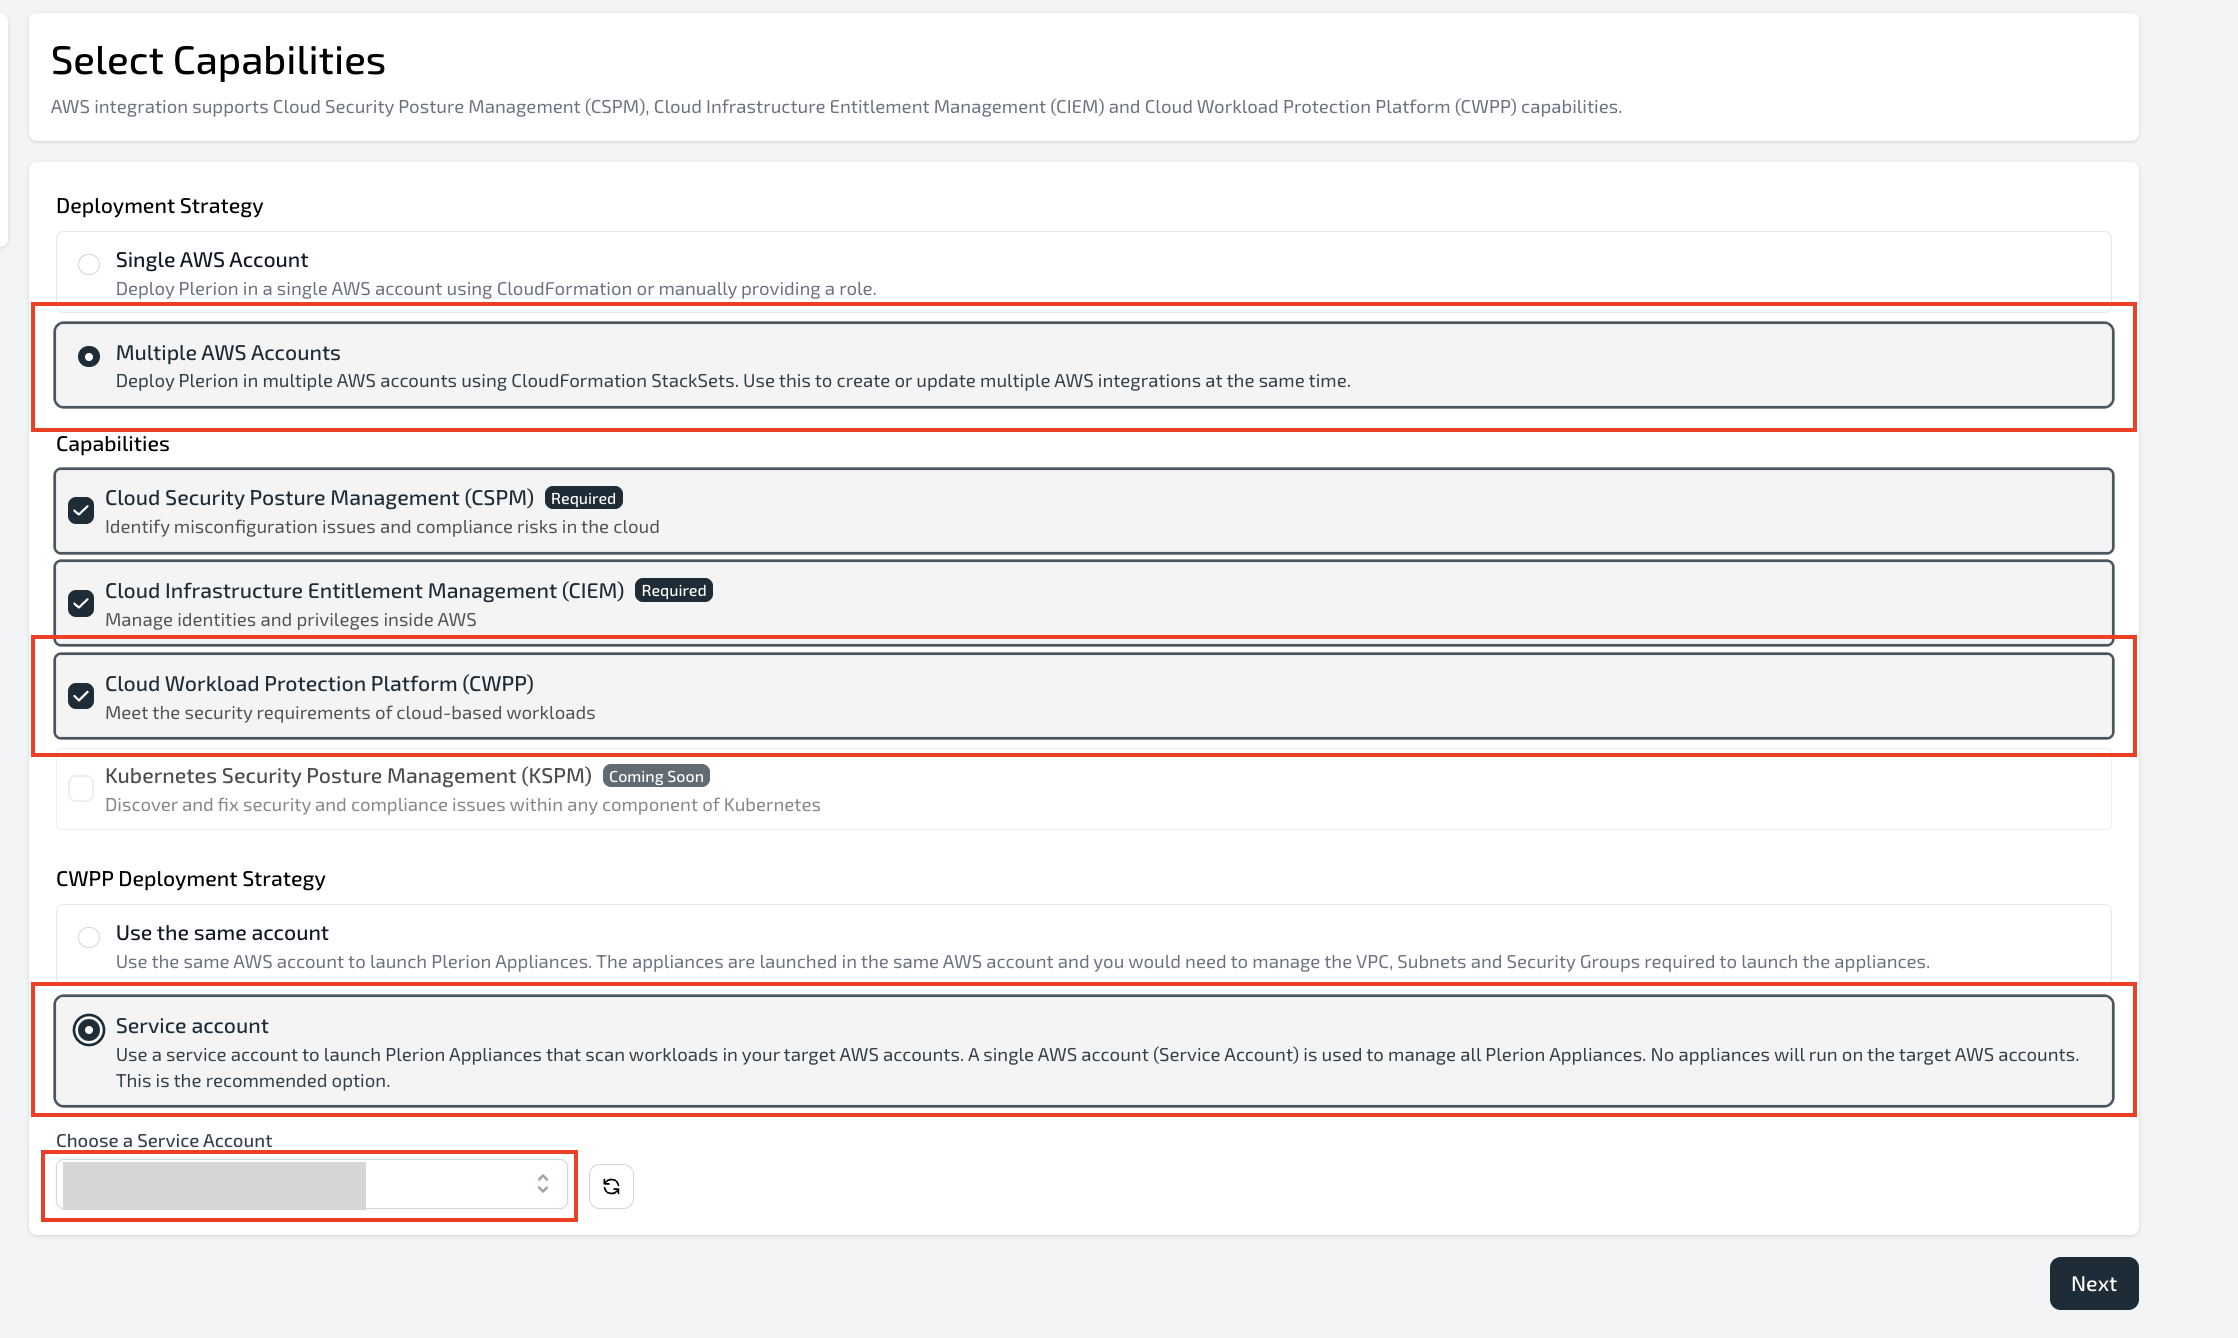
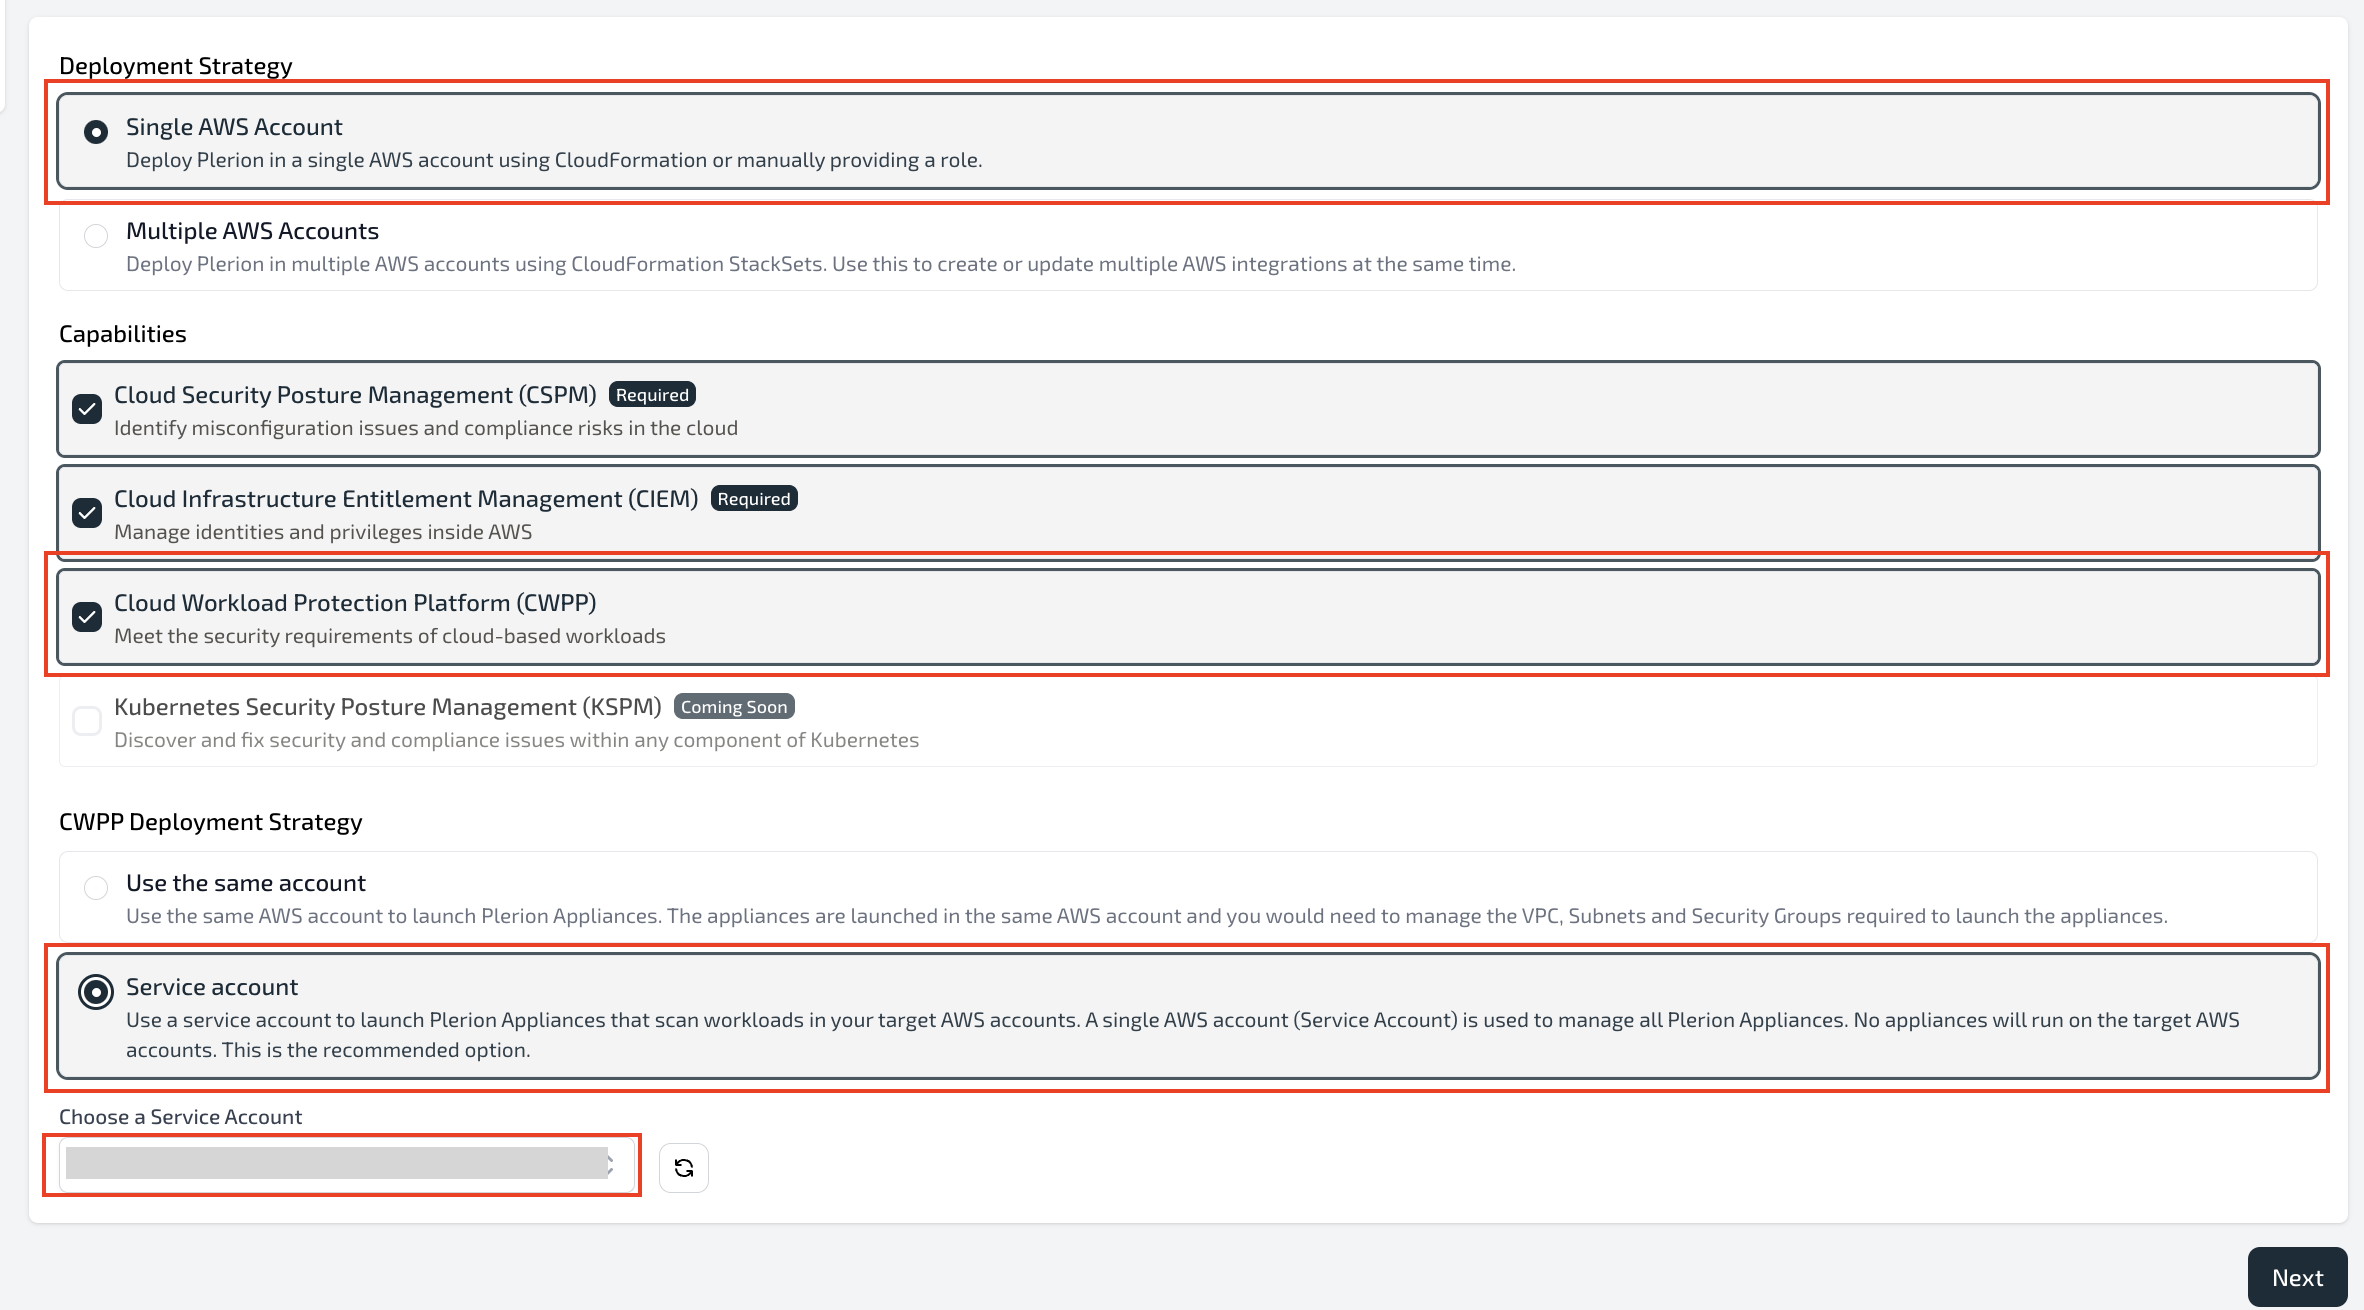
Choose Multiple AWS Accounts as the Deployment Strategy.
-
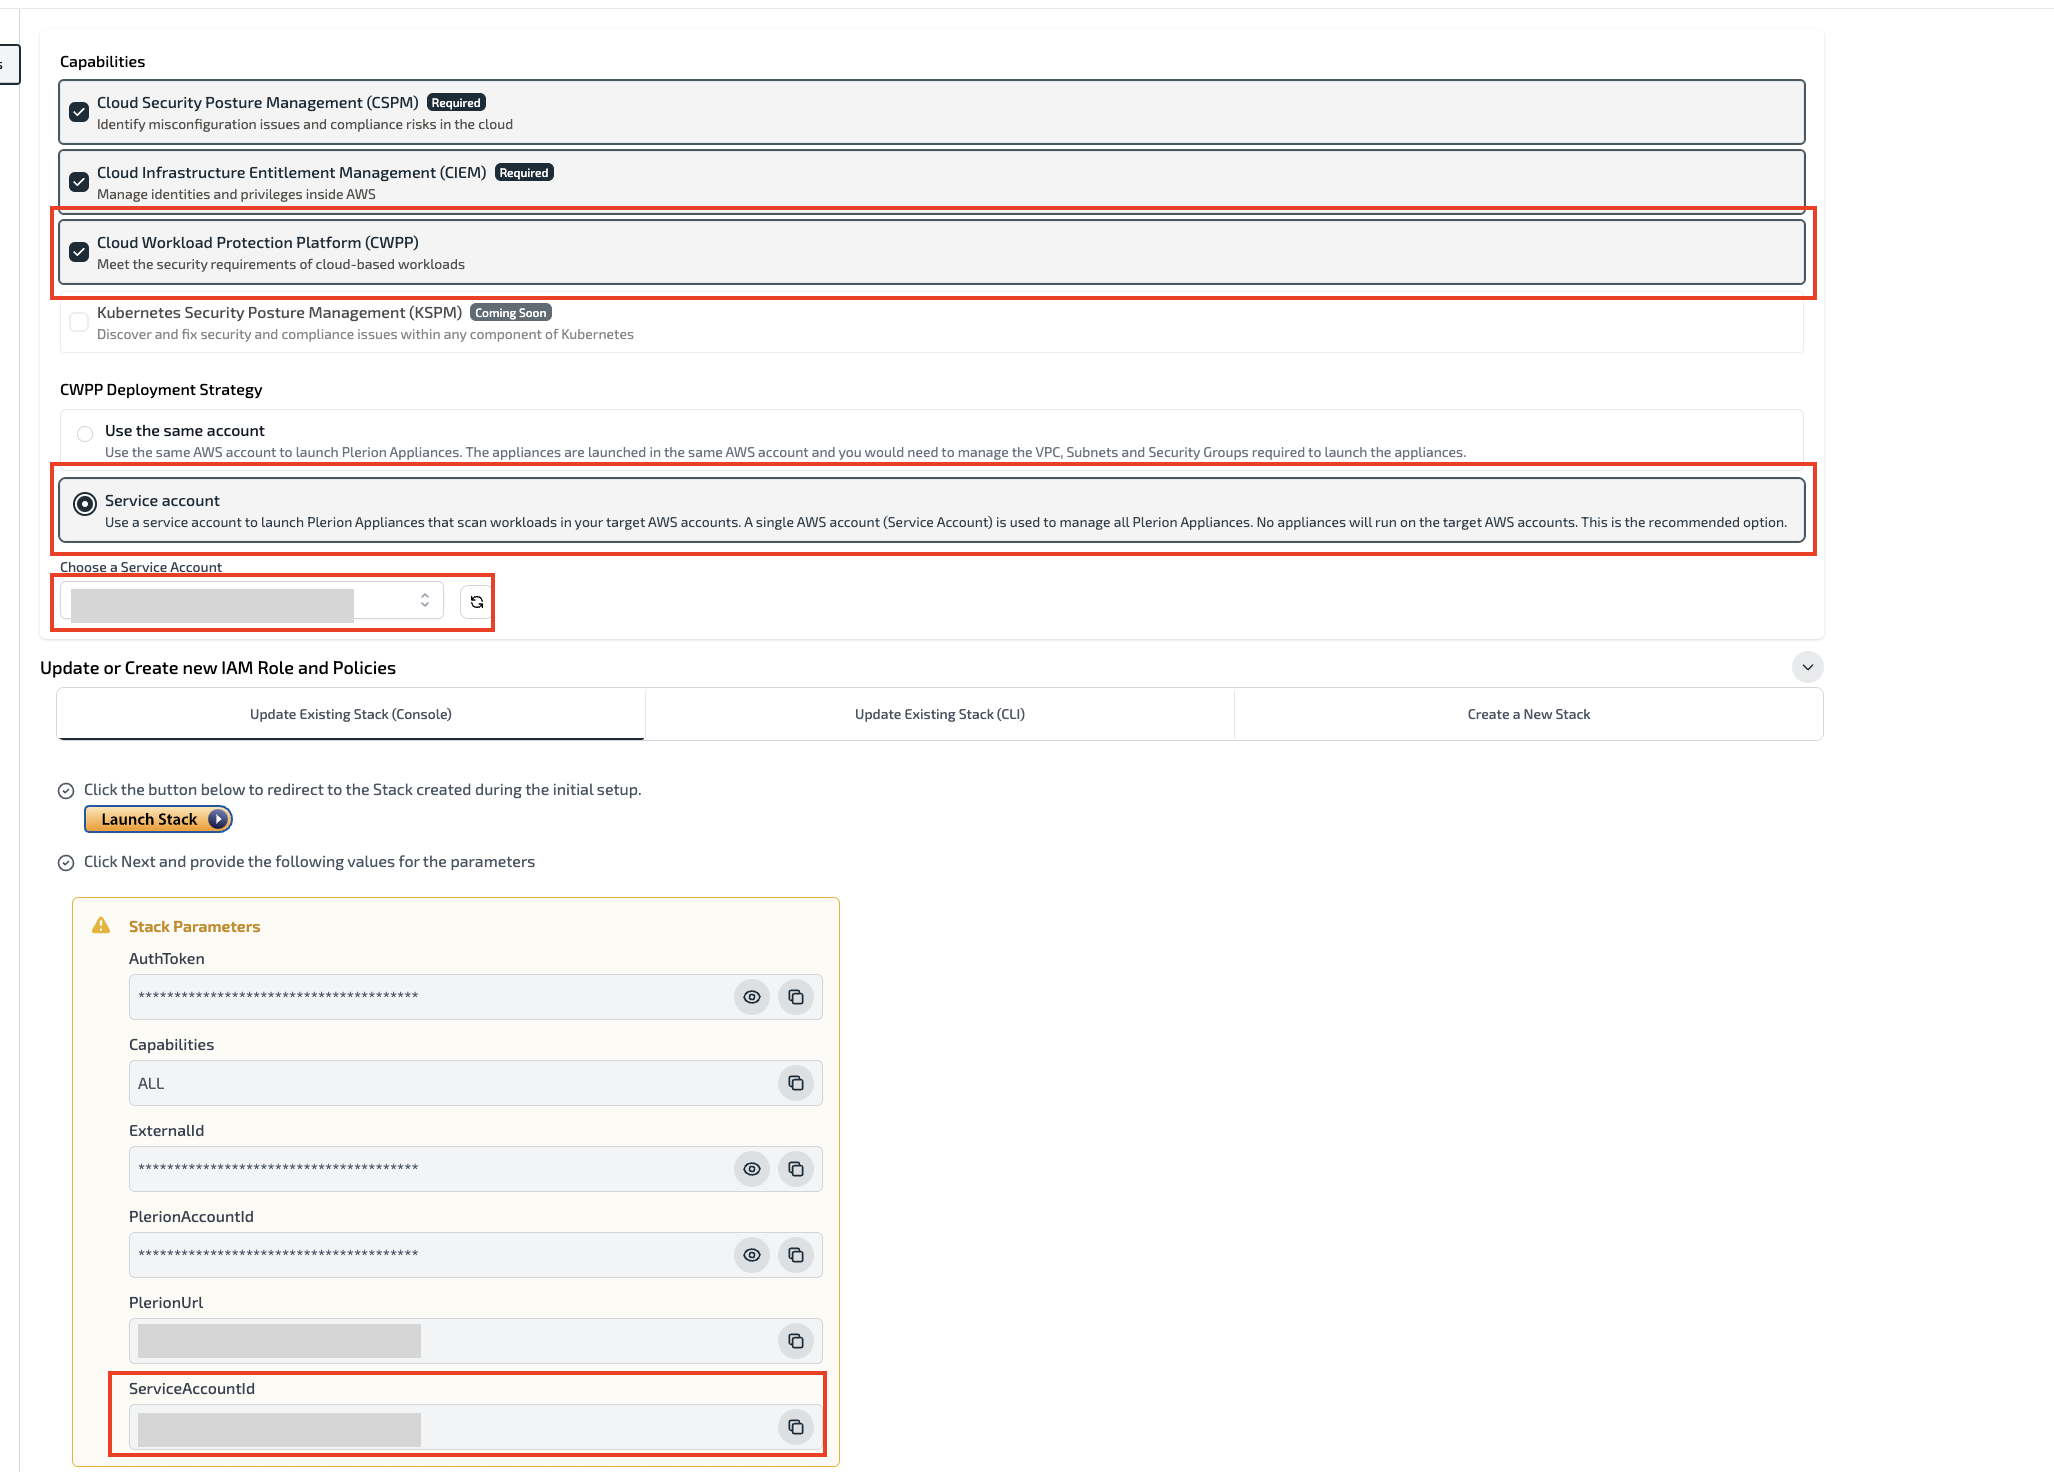
By default, the Cloud Security Posture Management (CSPM) and Cloud Infrastructure Entitlement Management (CIEM) capabilities are selected. Additionally, select Cloud Workload Protection Platform (CWPP).
-
Under the CWPP deployment strategy, select the Service account and choose the service account you previously created.
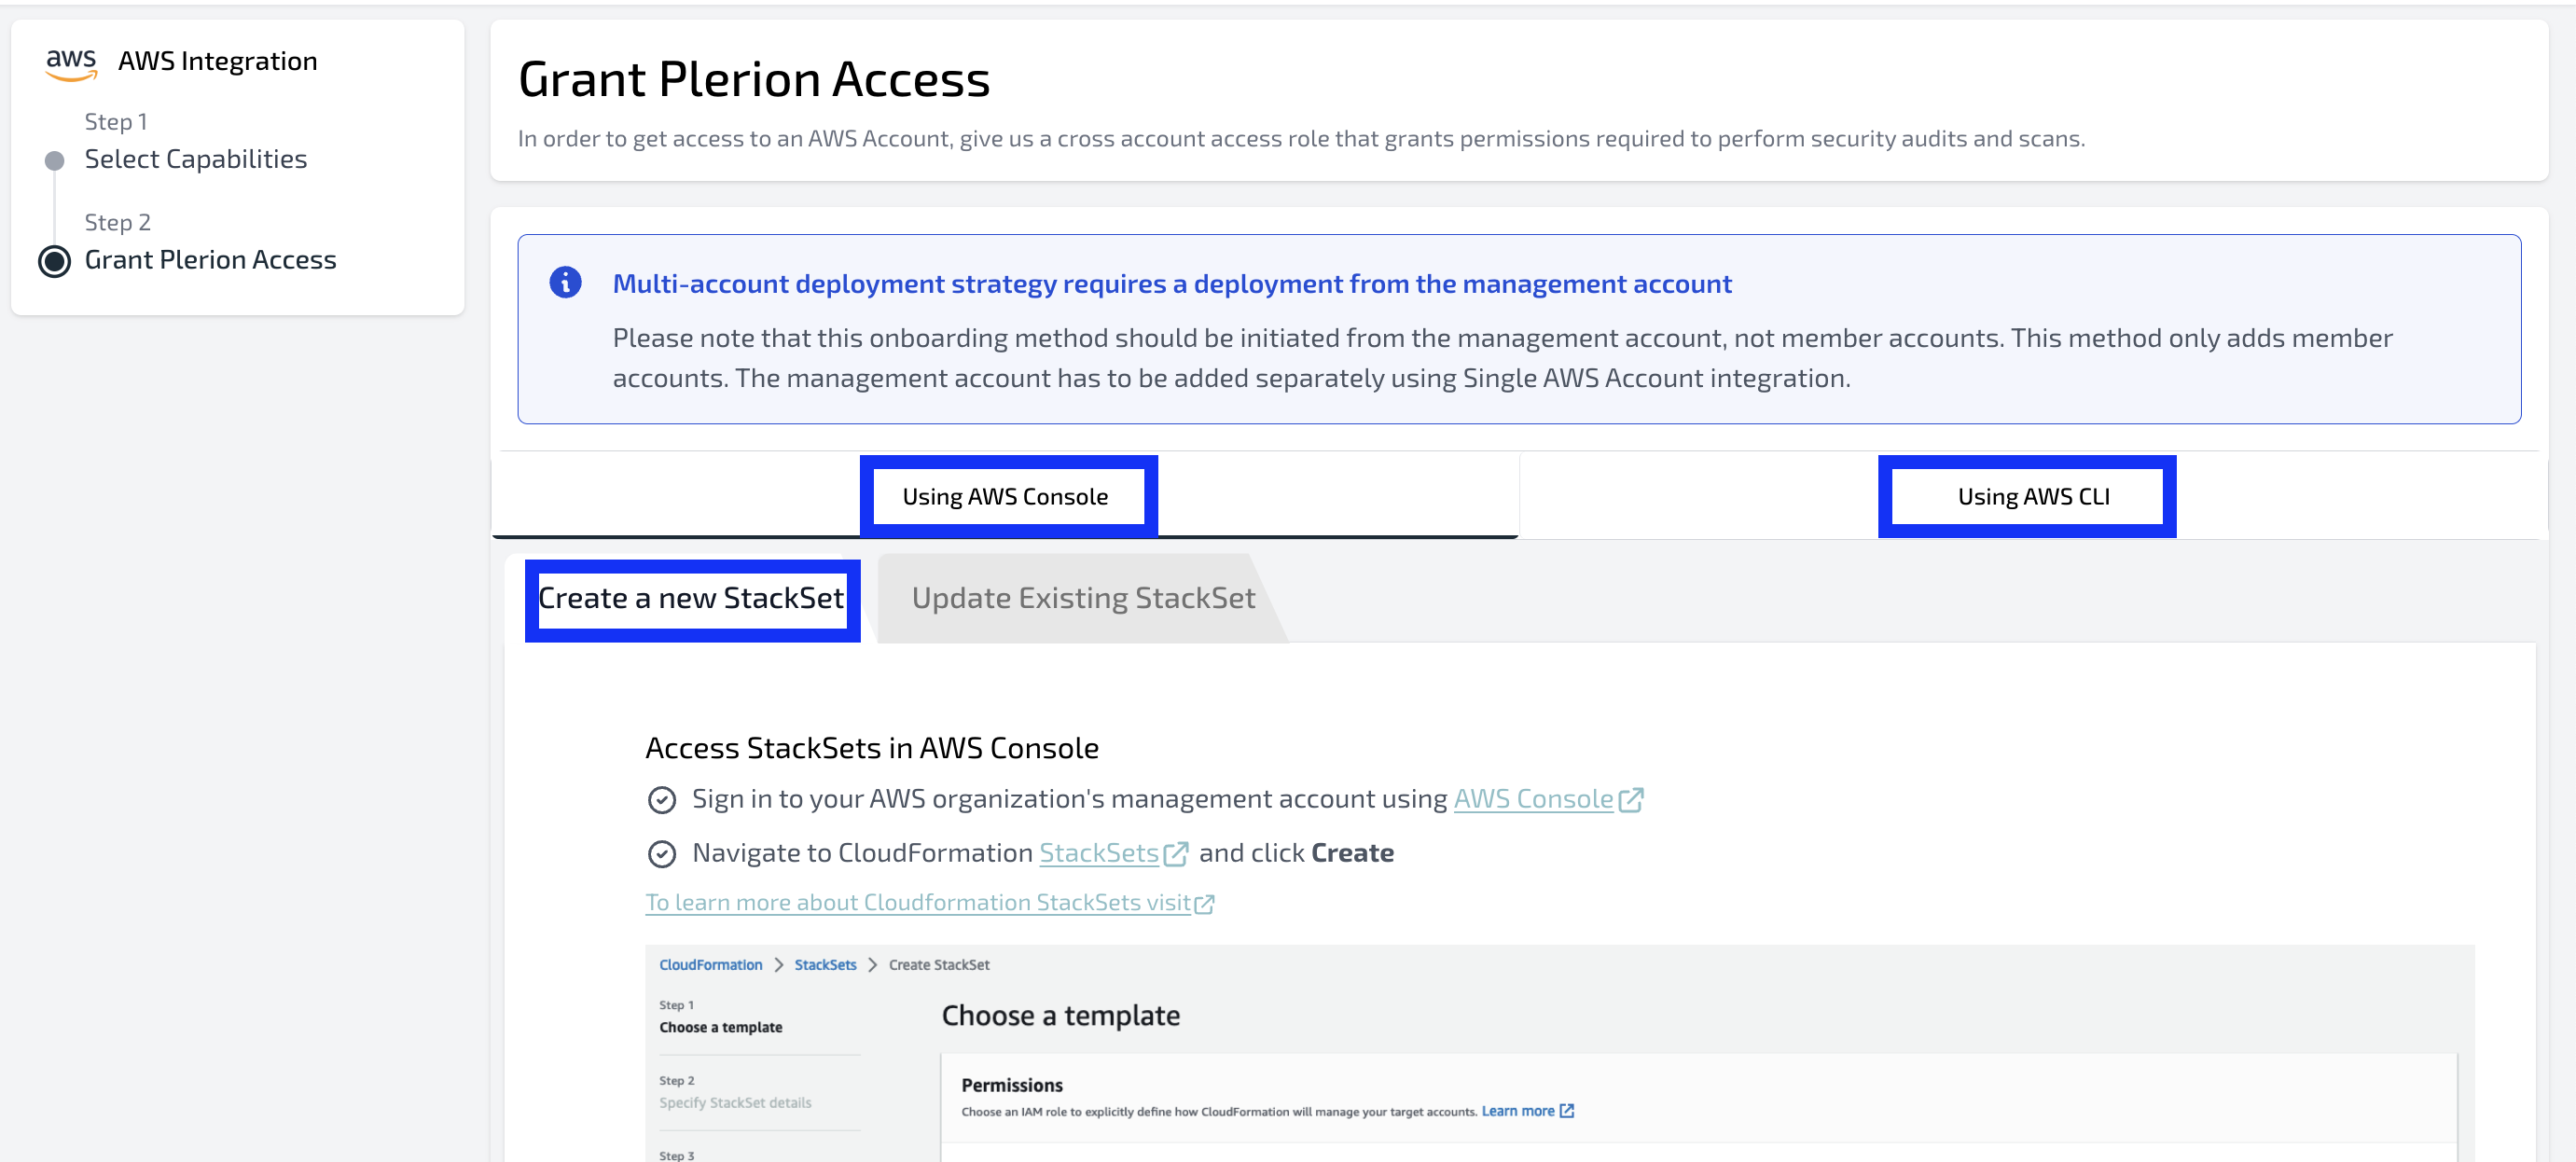
- Users have the option to onboard the accounts using the AWS Console or the CLI. Select the appropriate tab accordingly.
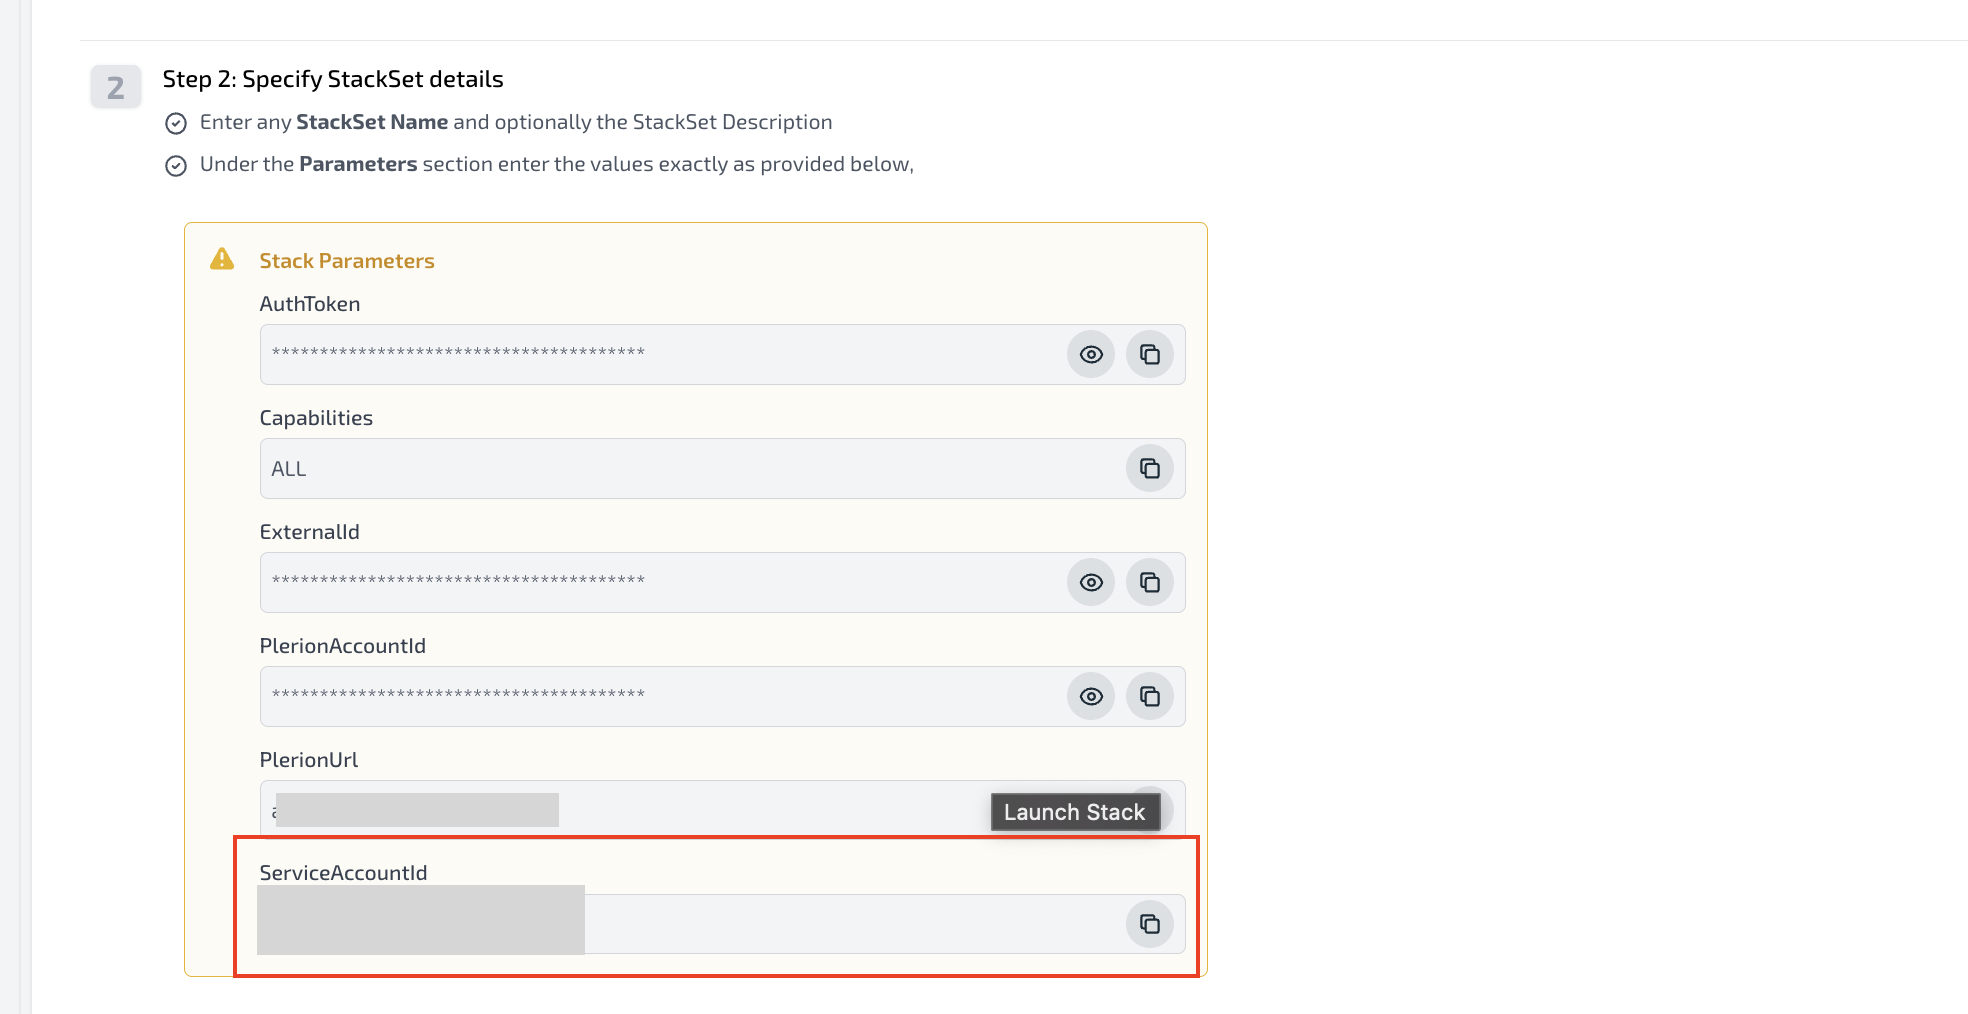
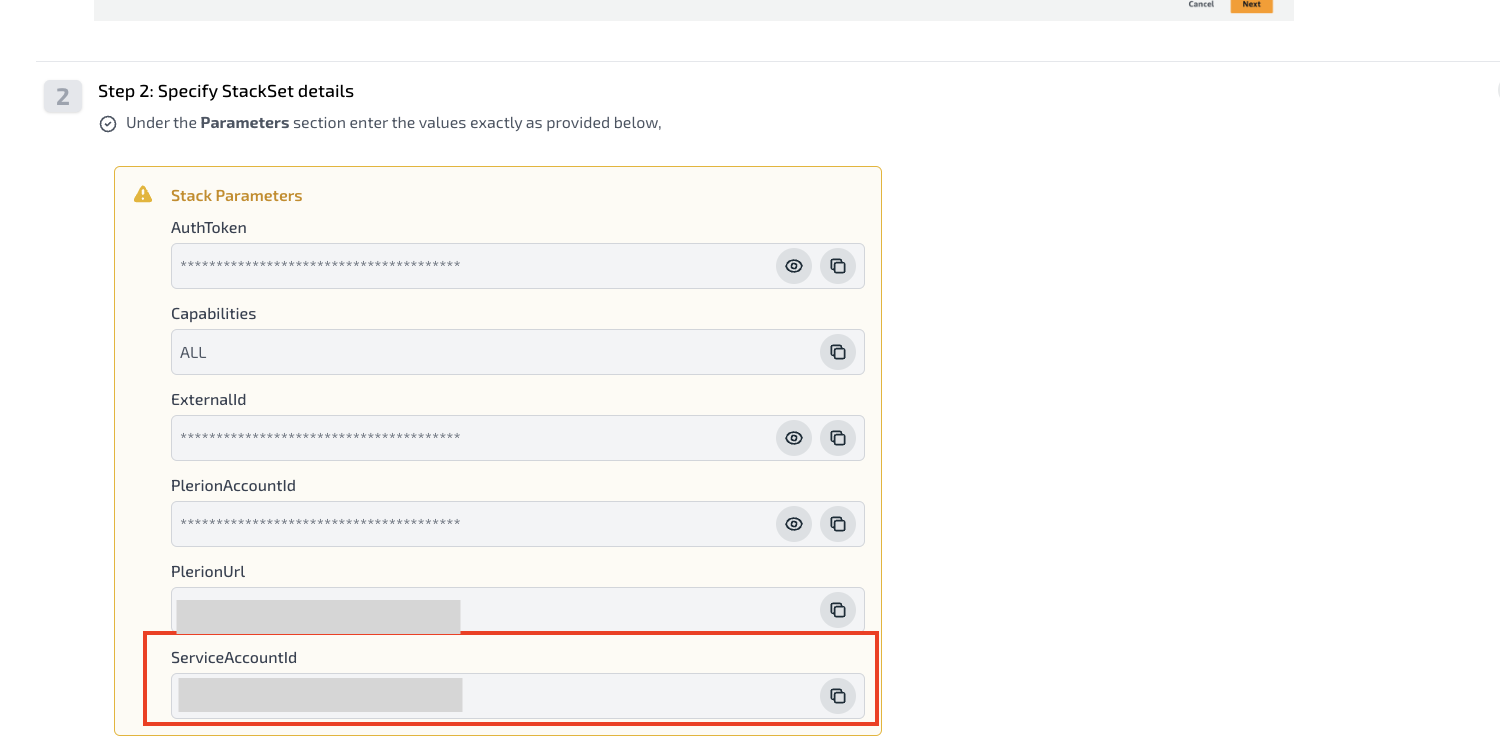
- Ensure that you use the ServiceAccountId from the section below.
-
Follow the instructions provided on the platform to onboard the accounts within your AWS organization.
-
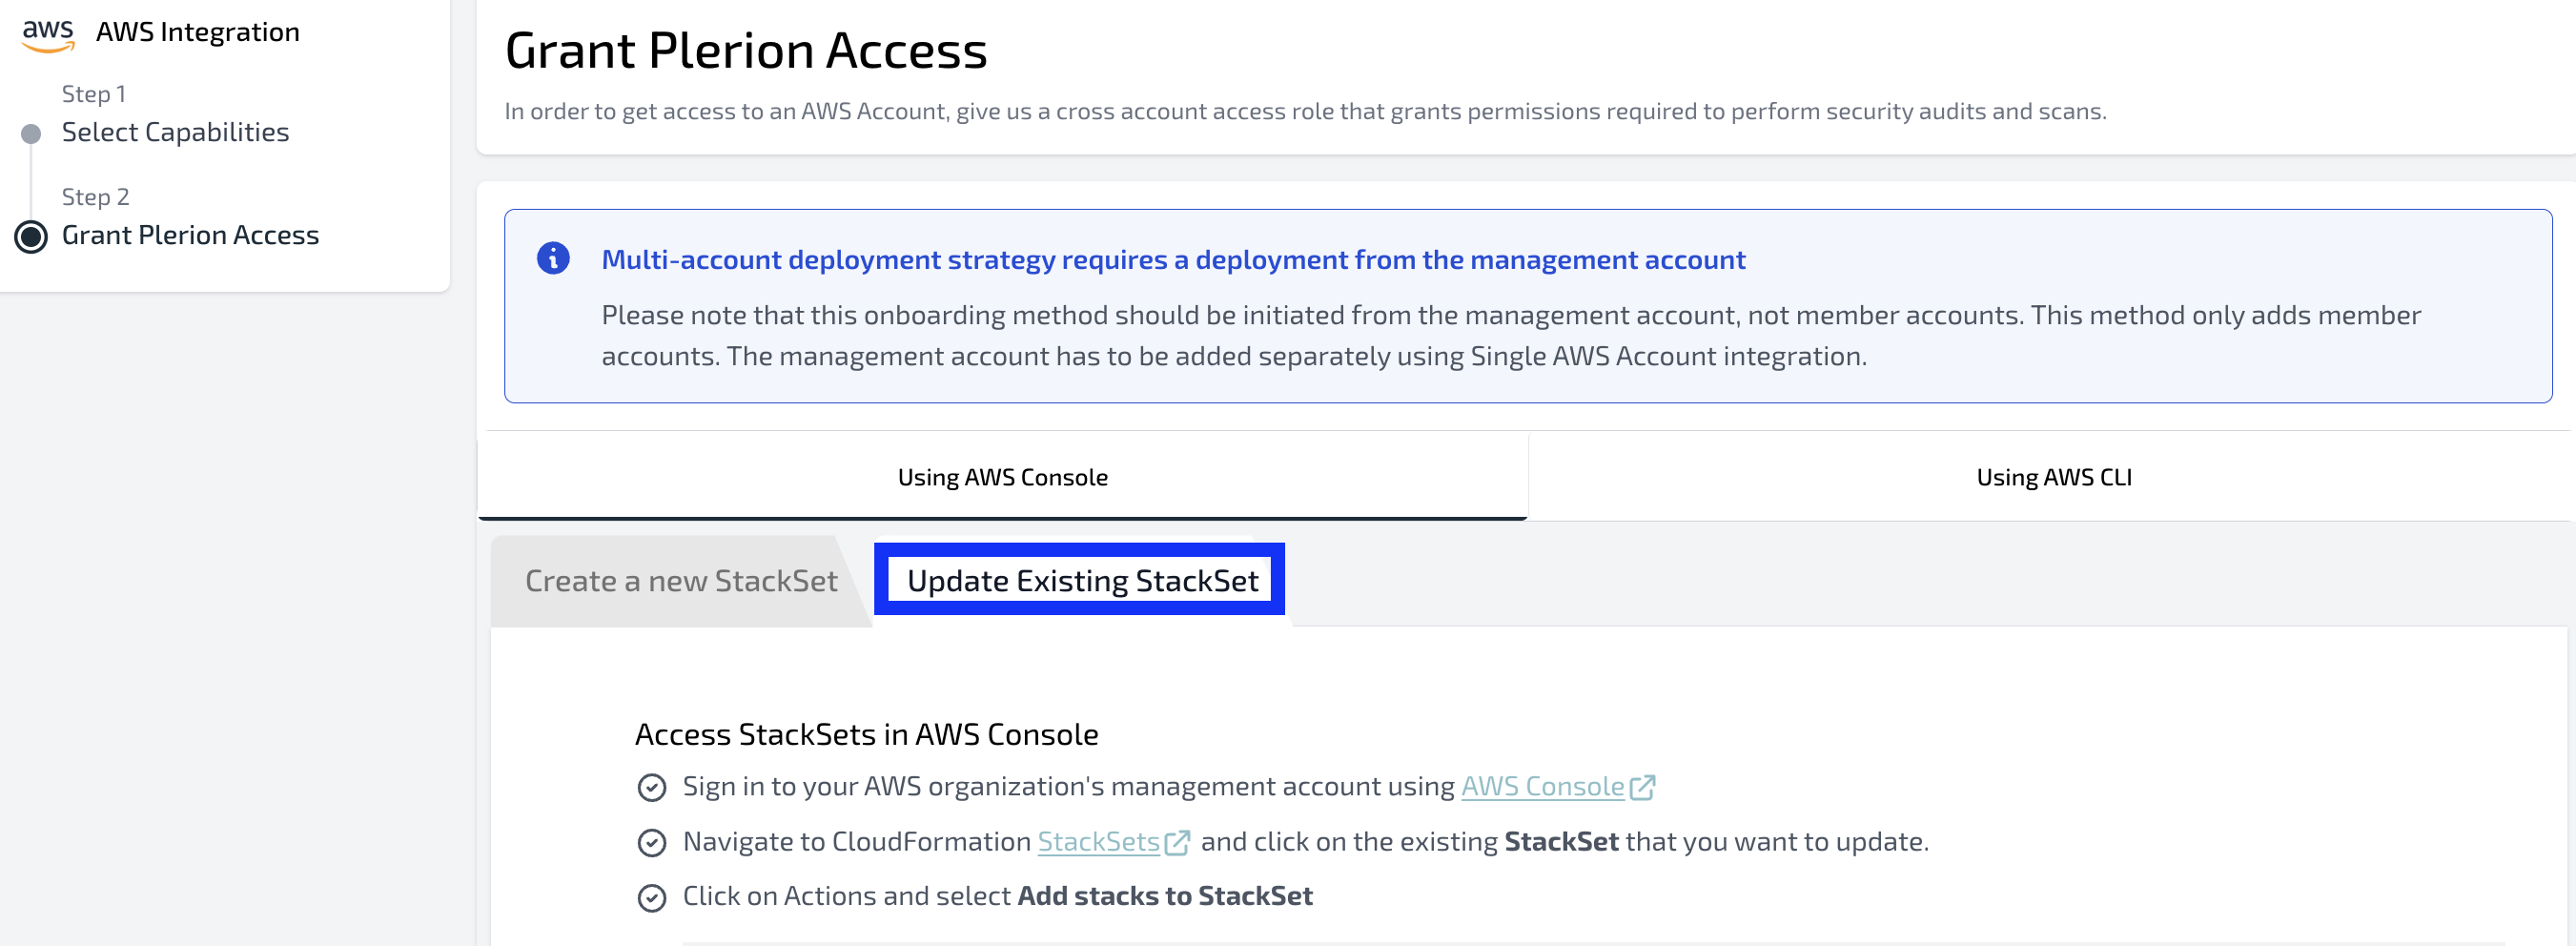
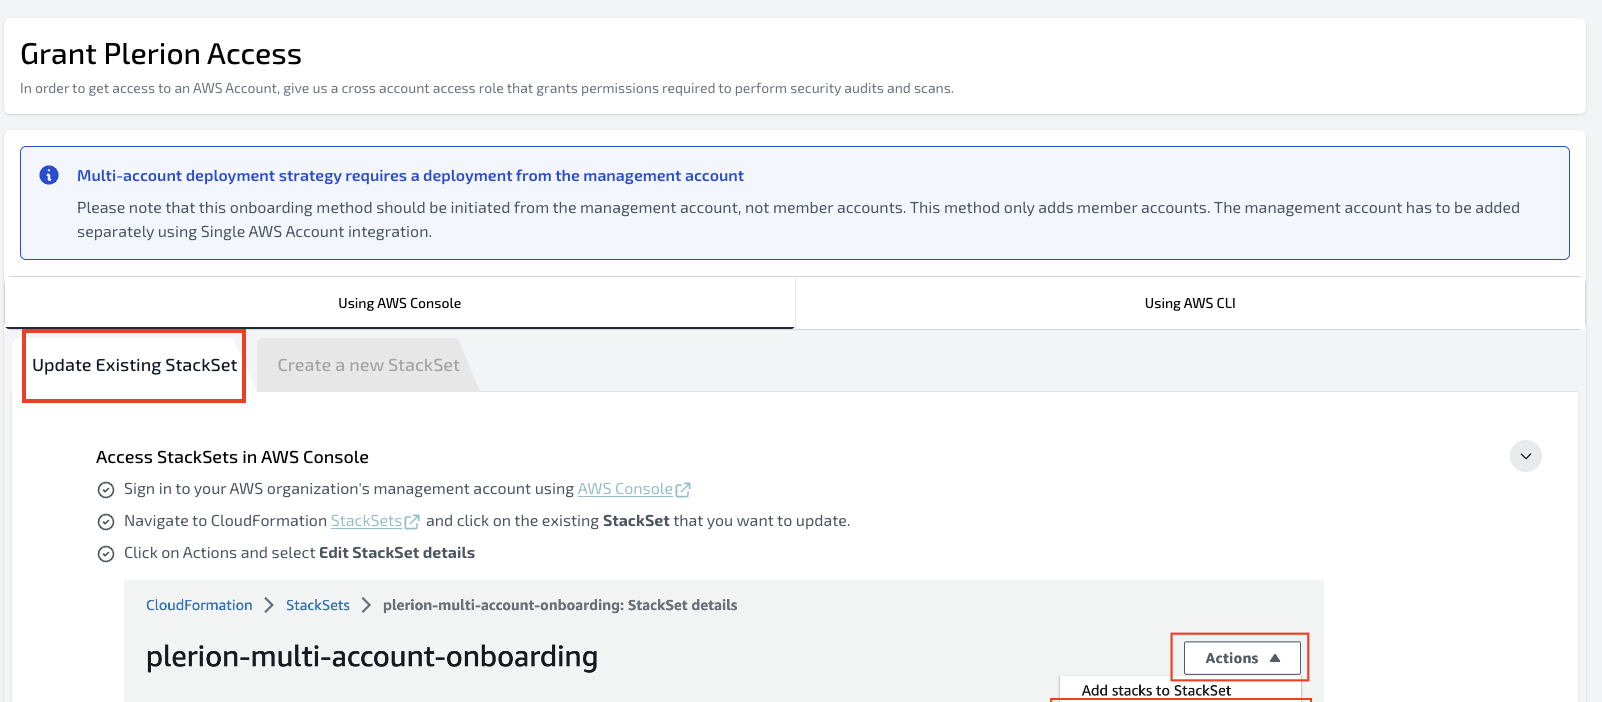
If some accounts in the management account have already been added and there are more to be added, select the 'Update Existing StackSet' tab and follow the instructions.
- Once the StackSet instance is completed, all the AWS account integrations created will be linked to the service account.
Onboarding Single AWS Account Integration
-
On the Plerion Dashboard, click on
Tenant Settingsand click onIntegrations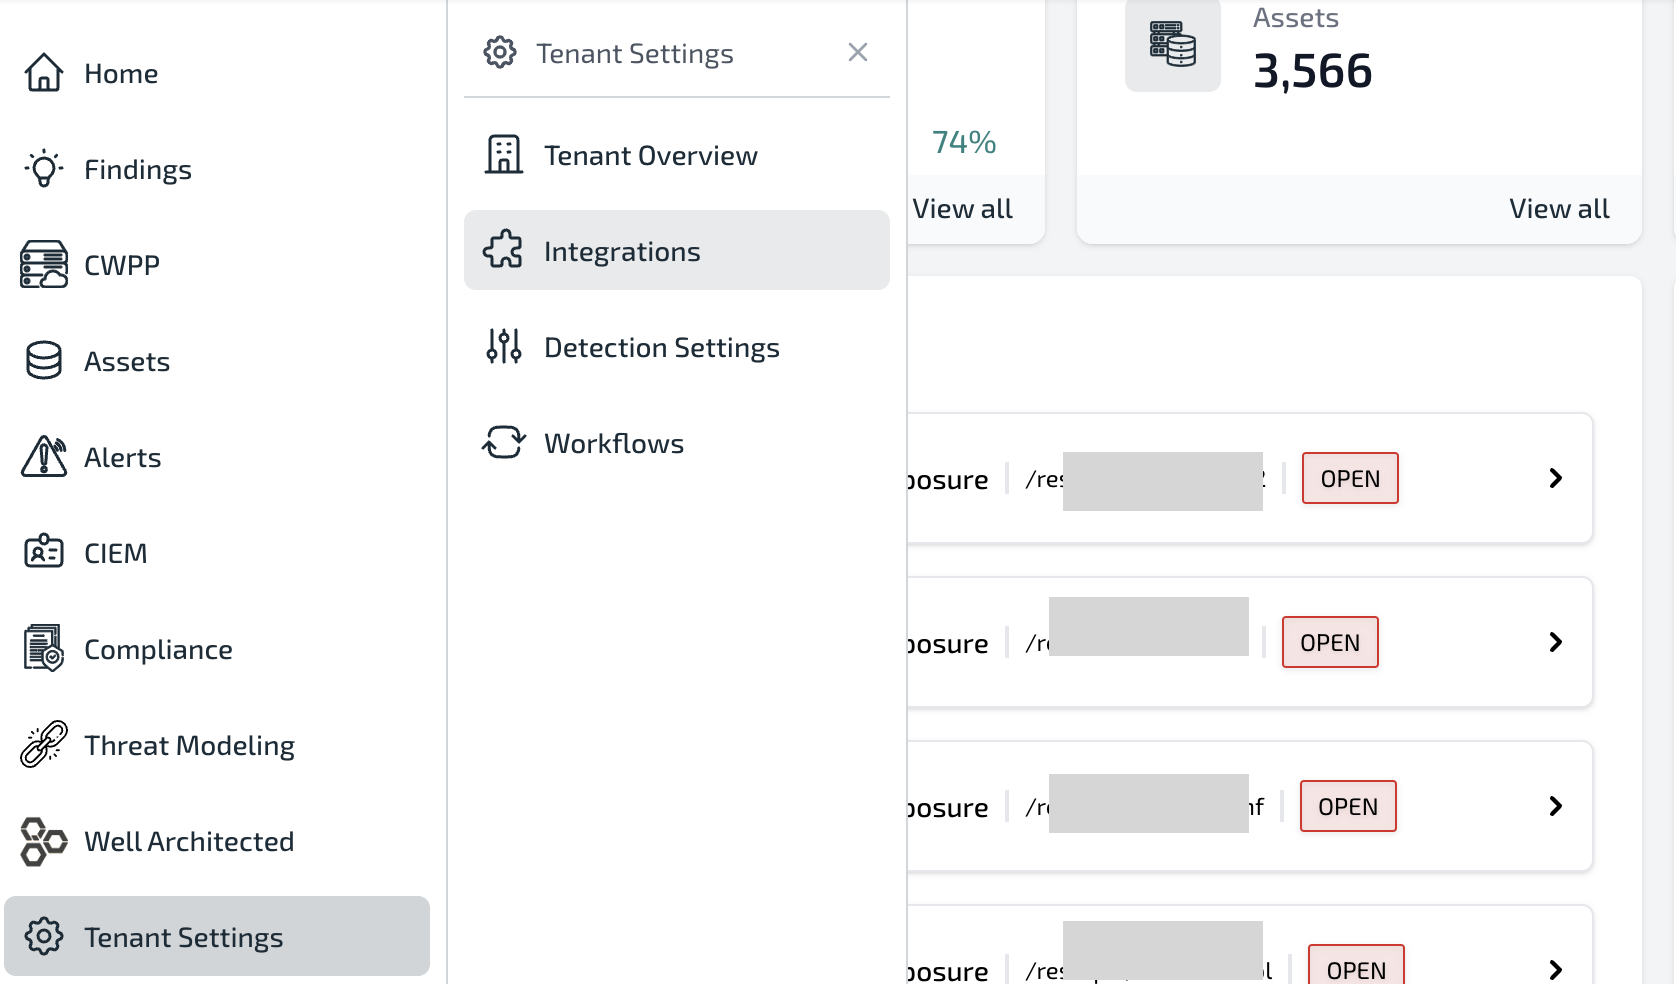
-
Click on the Inbound tab and click on the
+button -
By default, select the Cloud Security Posture Management (CSPM) and Cloud Infrastructure Entitlement Management (CIEM) capabilities. Additionally, select Cloud Workload Protection Platform (CWPP).
-
Under the CWPP deployment strategy, select Service account and choose the service account you created in the previous step.
-
Click on Next.
-
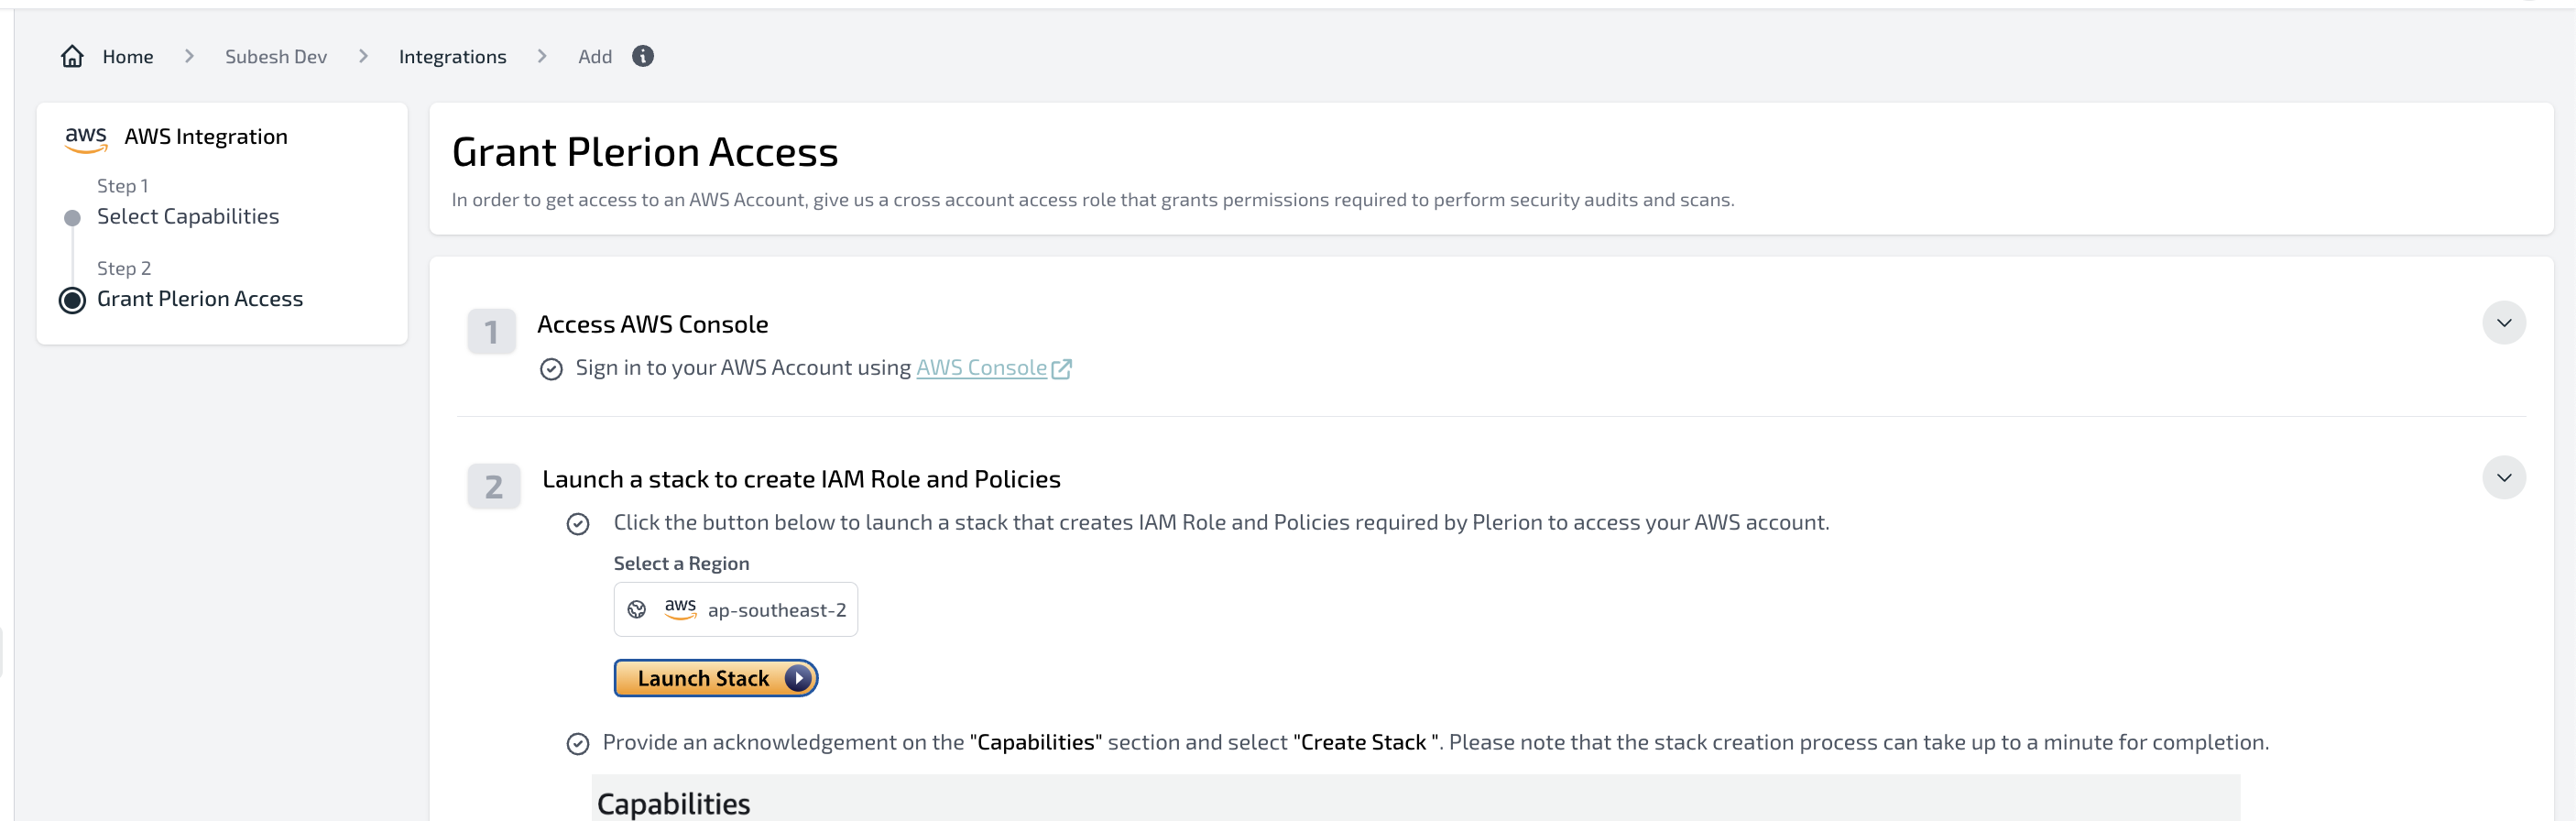
Ensure that you have already signed in to your target AWS Account Management Console. Then, click on Launch Stack.
-
Make sure the service account parameter is present in the Stack Parameters. After confirming, click on Create Stack.

-
Once the stack is created, the AWS account integration will be created with the service account linked to it.
Updating an Existing Target Account
When editing an existing target account, you have the option to select the service account you wish to use for that particular target account.
Updating Multiple AWS Account Integration
-
Go to Tenant Settings - Integrations and click on the '+' button on the AWS Account widget. Choose Add accounts using Multi-Account Onboarding.
-
By default, select the Cloud Security Posture Management (CSPM) and Cloud Infrastructure Entitlement Management (CIEM) capabilities. Additionally, select Cloud Workload Protection Platform (CWPP).
-
Under the CWPP deployment strategy, select Service account and choose the service account you created in the previous step. Click on Next.
-
Select the Update Existing StackSet tab and follow the provided instructions.
-
Ensure that you use the ServiceAccountId from the section below.
-
Follow the instructions on the platform to update the accounts within your AWS organization.
-
Once the StackSet instance is completed, all existing AWS account integrations and new ones will be linked to the service account.
Updating Single AWS Account Integration
-
Go to Tenant Settings - Integration and navigate to the AWS Account integration.
-
Click on the 'Edit' icon next to the Role ARN or capabilities.
-
To link the service account to an existing integration, enable the Cloud Workload Protection Platform (CWPP) capability and choose Service account under the deployment strategy. Select the service account you created in the previous step.
-
To update the Plerion template for an existing integration, modify the stack parameters as shown in the above image.
-
AWS Account integrations can be updated in 'Automated' mode, which is recommended by Plerion. Users can choose to update their existing stack using the AWS Console or AWS CLI, following the provided instructions.
-
Once the stack is updated, the AWS account integration will be updated with the service account linked to it.
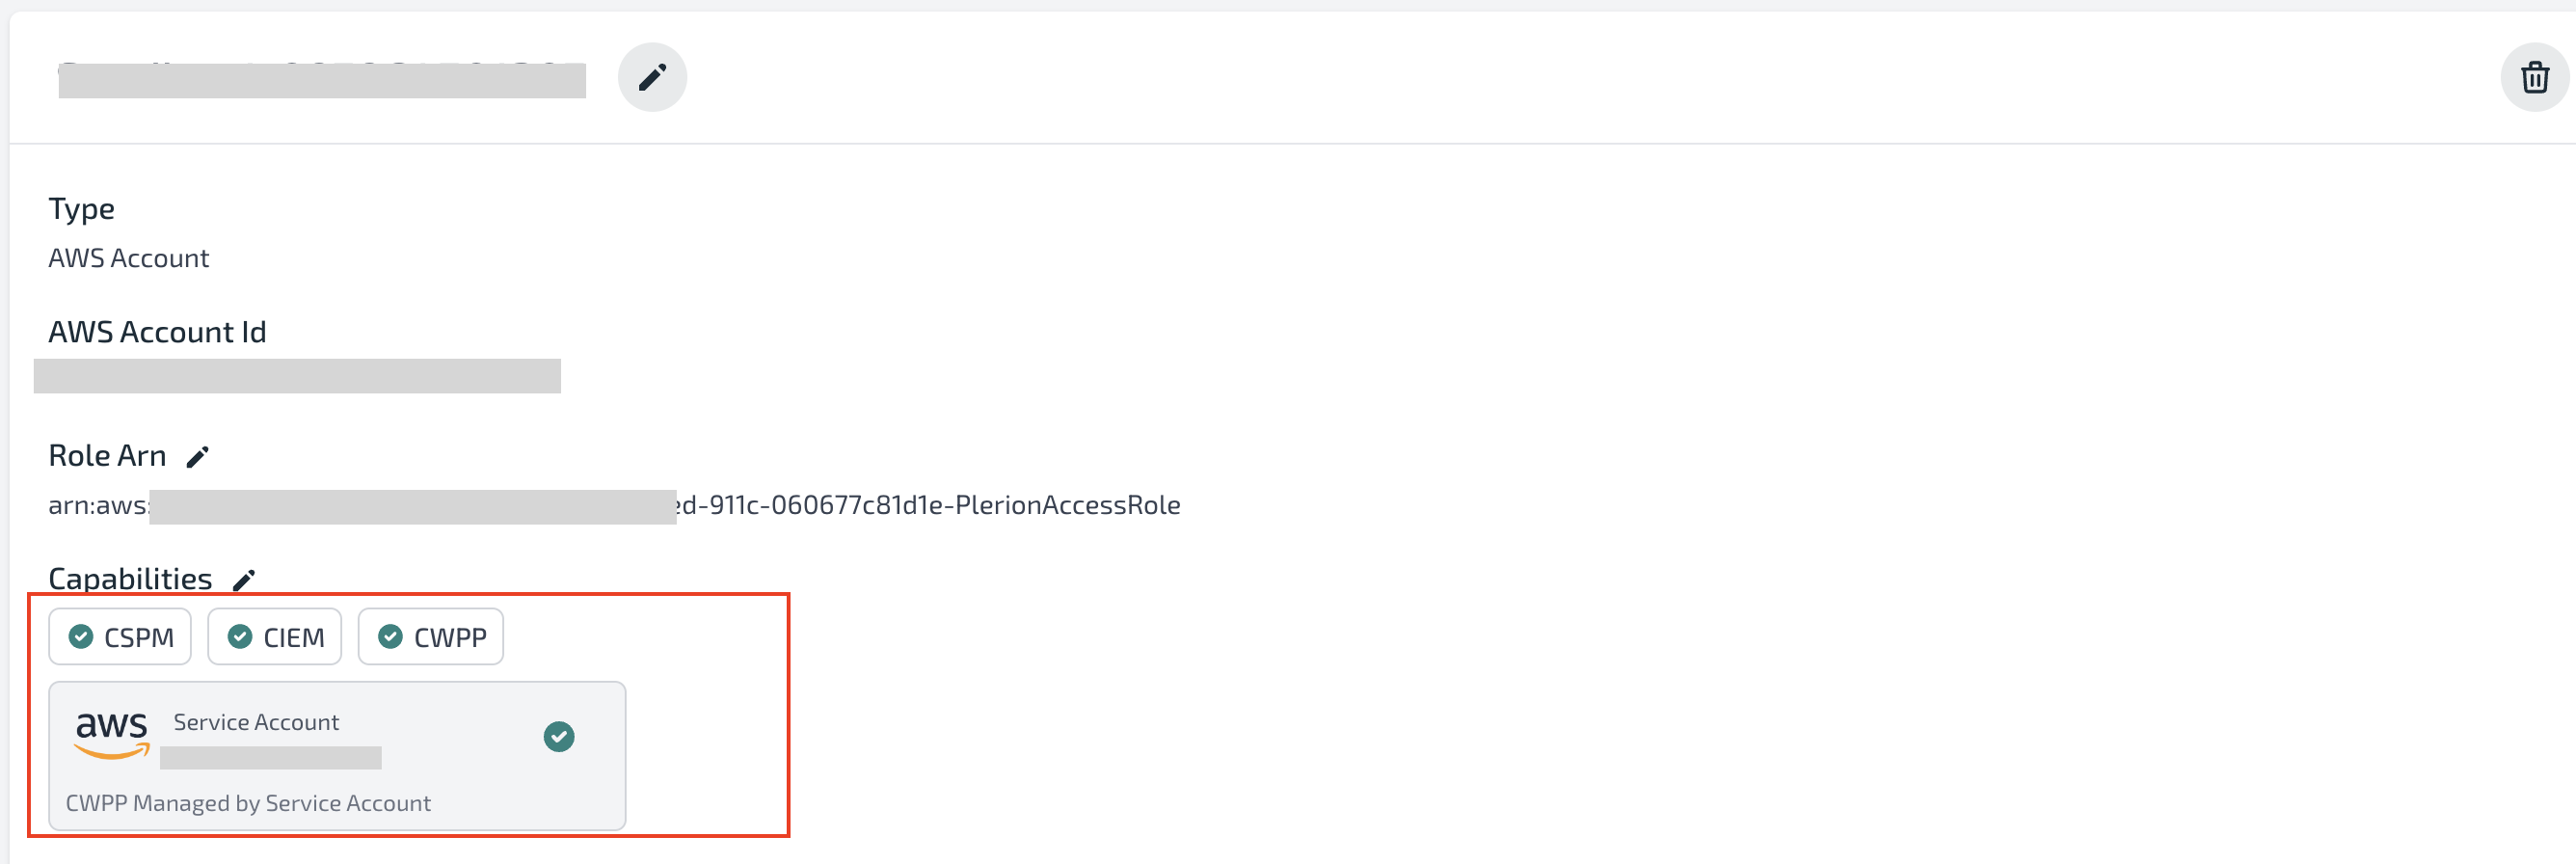
Verifying the Service Account is Linked to the Target Account
After linking the service account to the target account, you can verify it by going to the AWS Account integration in Tenant Settings - Integrations.
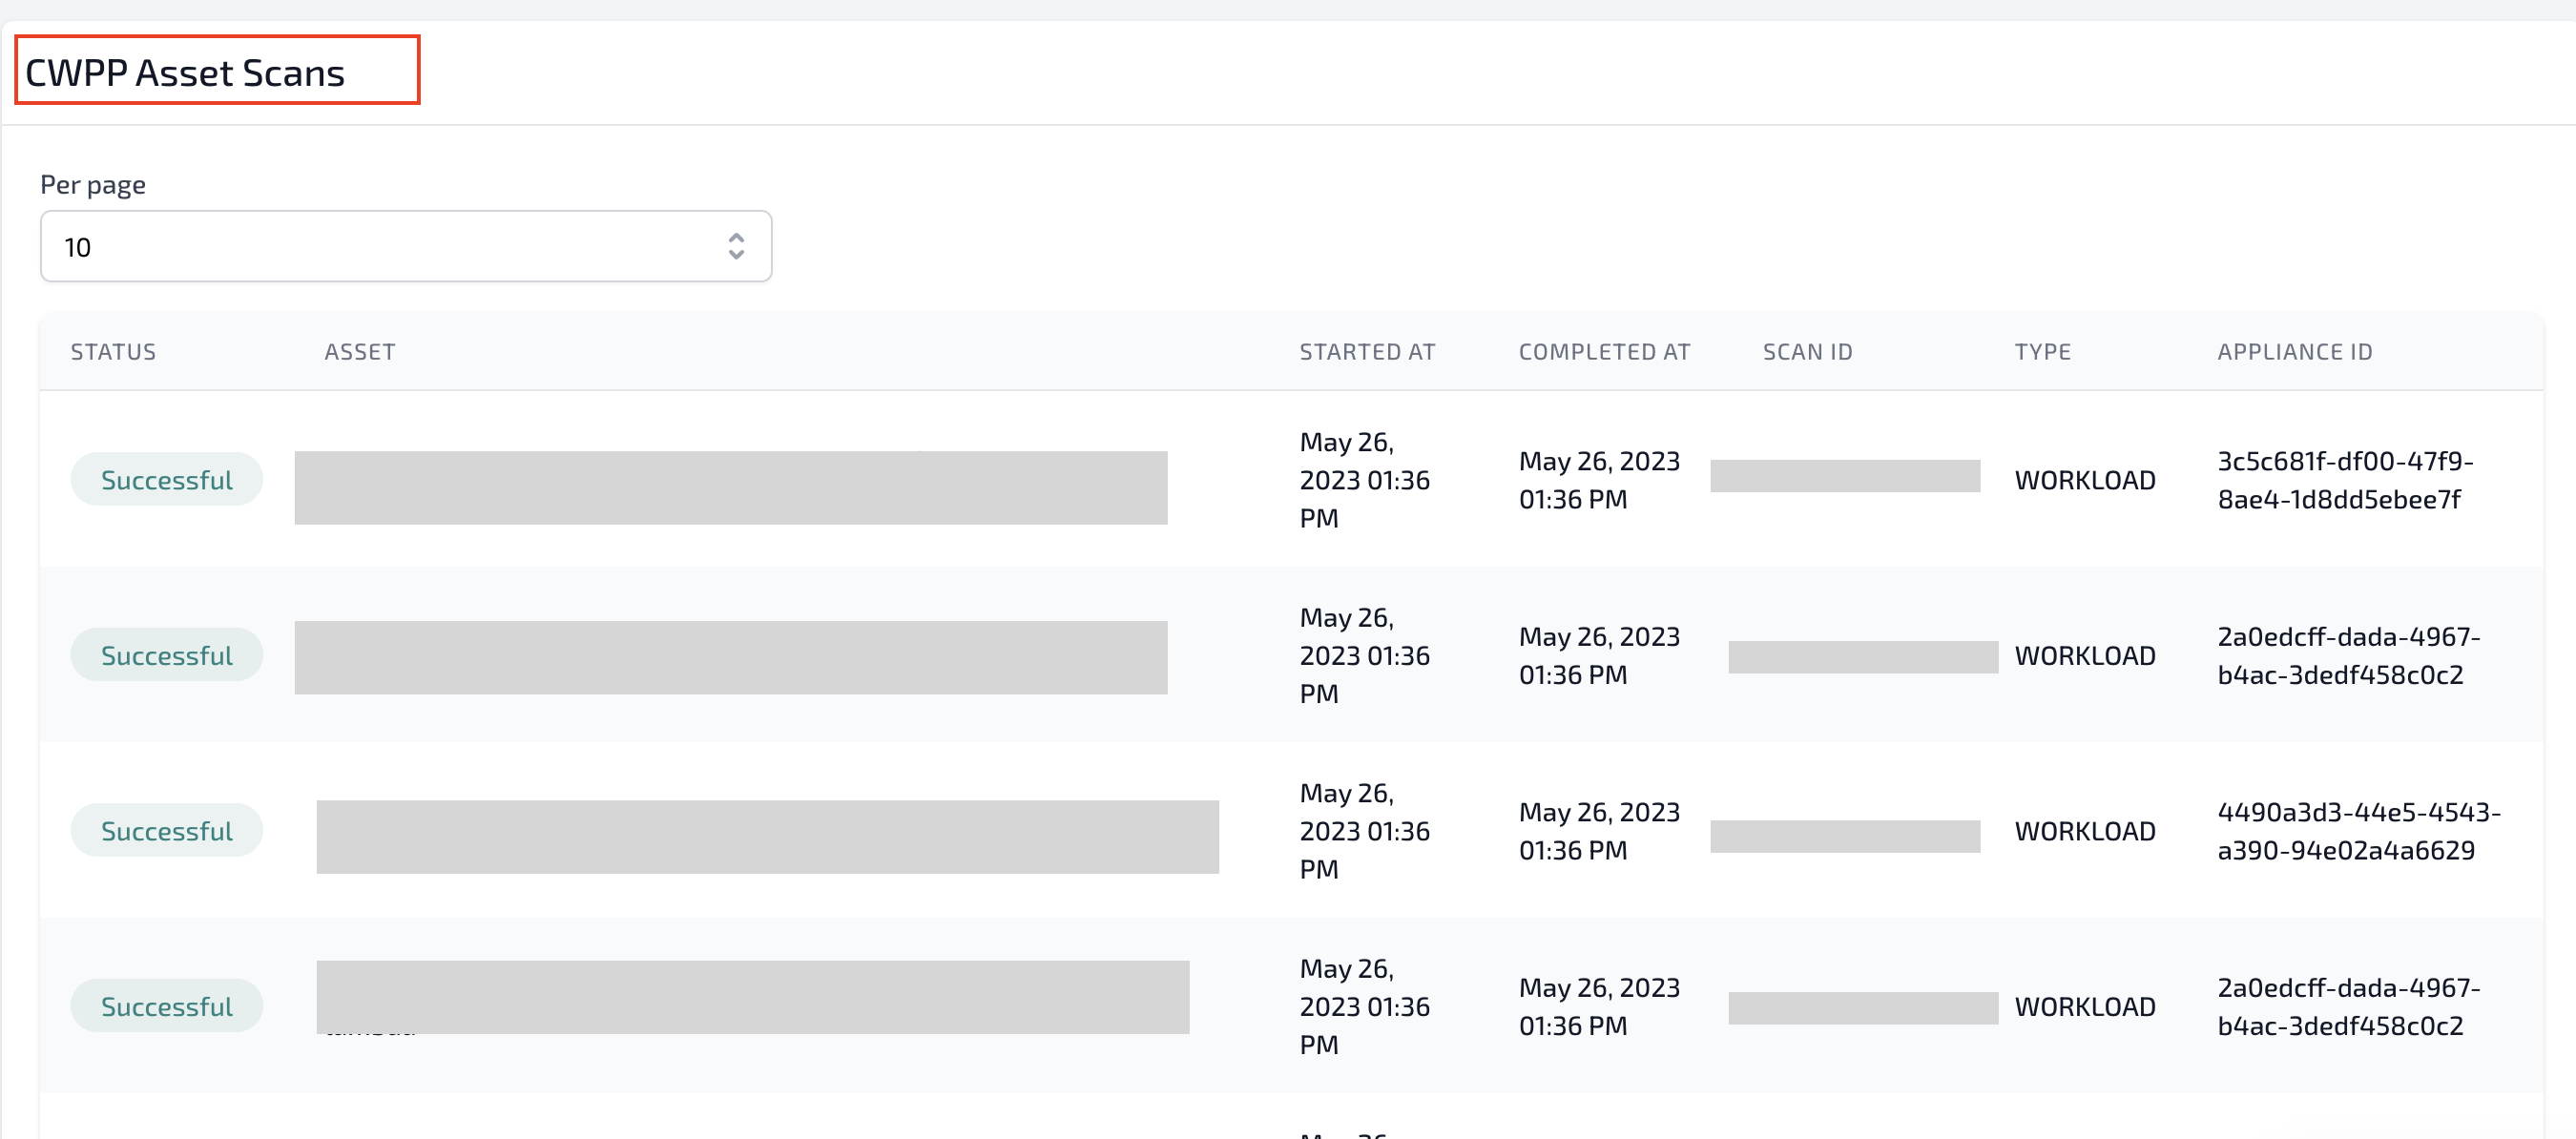
The scans will start appearing in the CWPP Asset Scans section.
Resources Created
- A new IAM role is created in the target account with the name
PlerionApplianceRole. The role is passed to the Plerion appliances running in the target account to perform the scans.
Limitations
- The service account can only be linked to a target account that is part of the same AWS organization.